Referral
Creating A Referral
From the concern dashboard, the user may choose to escalate the concern by creating a referral.
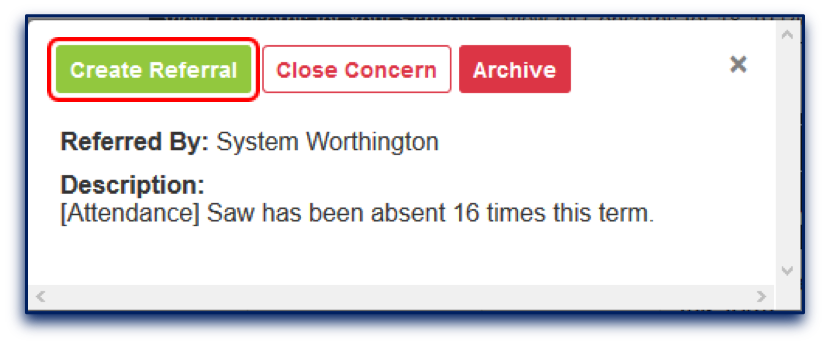
Once the Create Referral button has been clicked, the referral entry screen displays.
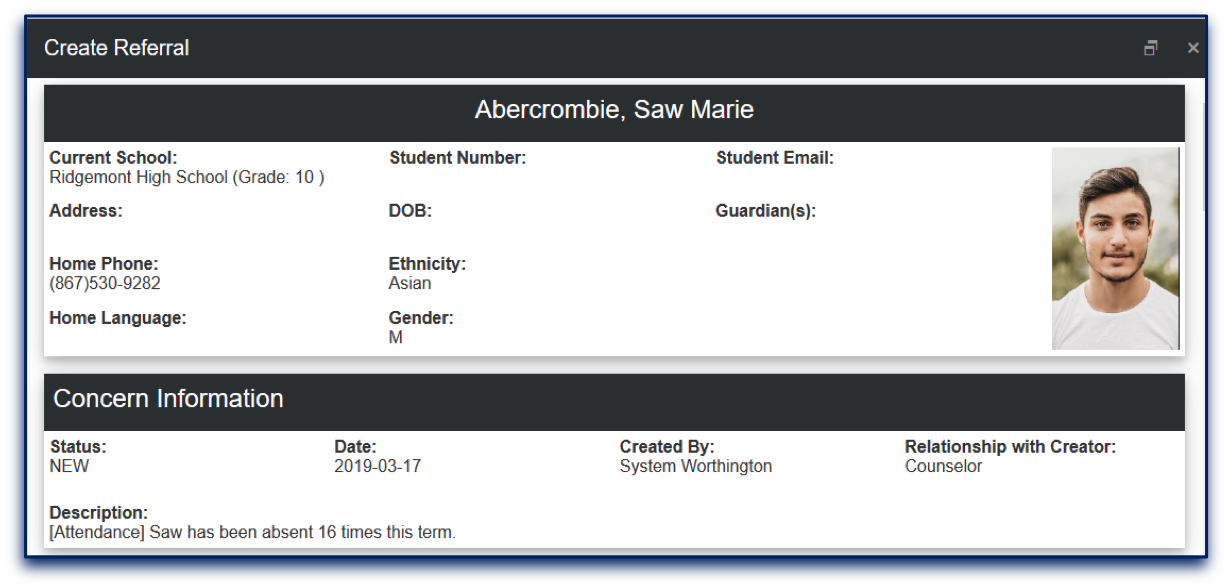
The first two sections of this screen are for reference. The student’s demographics information populates from his or her Infinite Campus account. Following that, concern information as it was originally input can be viewed.
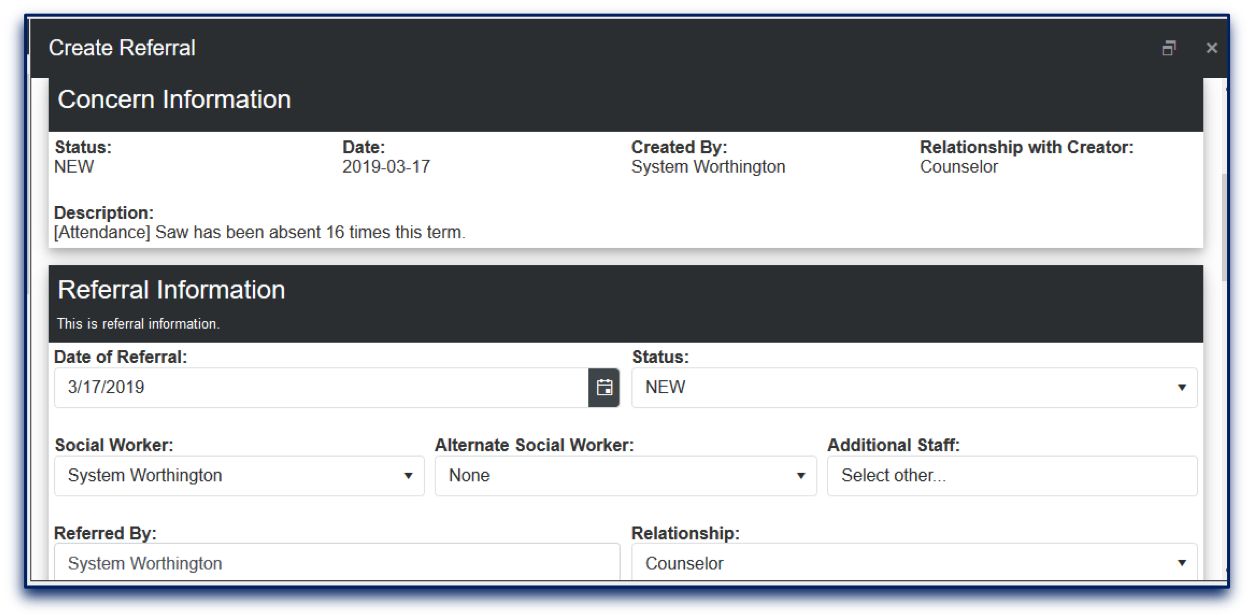
Beneath the Concern Information, the basic details of the referral display. The information there may be changed or added in.
The Social Worker field will automatically populate for schools with just one primary social worker. For those that contain more than one social worker, the person creating the referral will be required to select one. Users may also select an Alternate Social Worker and Additional Staff if appropriate to the referral. (Please note that for a user to display in the "additional staff" dropdown list, the staff member must have the "SWARM Additional Staff" box checked on their district assignments tab in Infinite Campus.) Other fields in this section include a text box for the Referred By staff member and a droplist for the relationship of the person creating the referral to the student.
Following the Referral Information section, the reasons for the referral display. The initiator of the referral may create as many reasons as necessary for the case in this area. The list of reason types are determined by administrators during the initial SWARM setup.

Next is a Homeless status area, which defaults to “no”:

When the Homeless status is changed to “yes”, the creator of the referral then selects from a droplist for Dwelling Code and Homeless Reason.

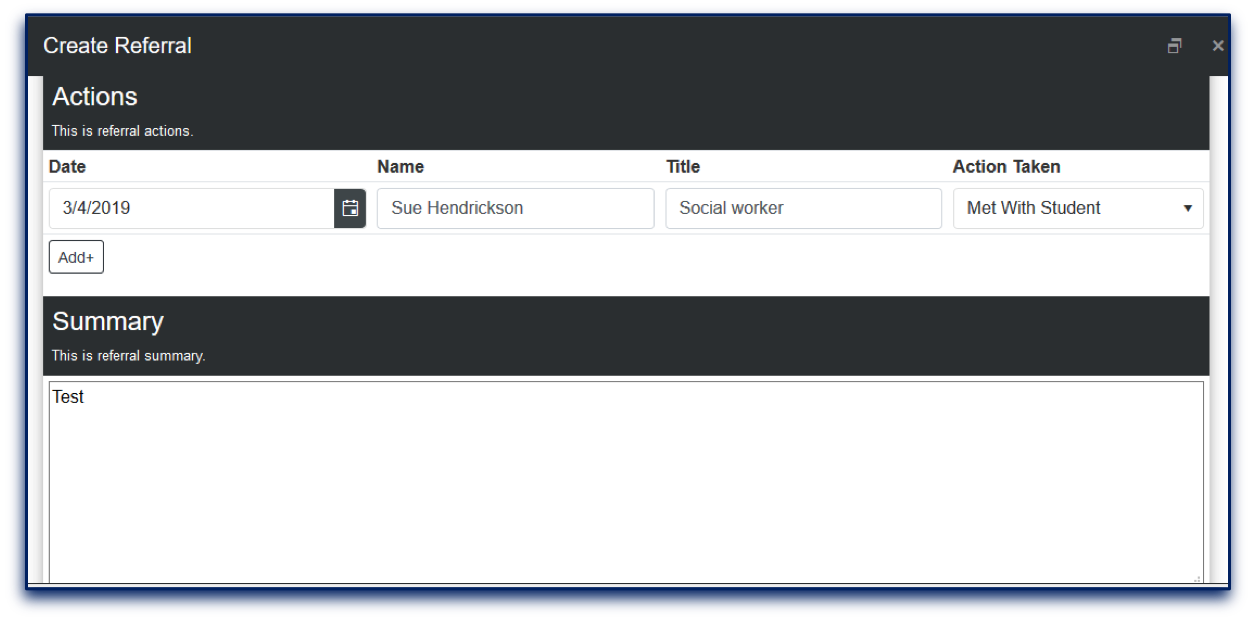
The Actions section allows owners of the referral to add a list of any activities that occur during the life of the referral, while the Summary area provides a place that the person in charge of the referral may describe the nature of the case. All areas on the referral page may be updated as the case requires.
The final section of the referral lists the names of any other students in the same household. The creator of the referral may check the box next to the name of anyone listed there if a case also needs to be opened on that person’s behalf, as well.

Once the referral has been created using the button at the bottom of the screen, the user is taken to the Referral Dashboard, where the referral that has just been created will display at the top of the list. As with the Concern Dashboard, the Referral Dashboard may be filtered according to the column headers.
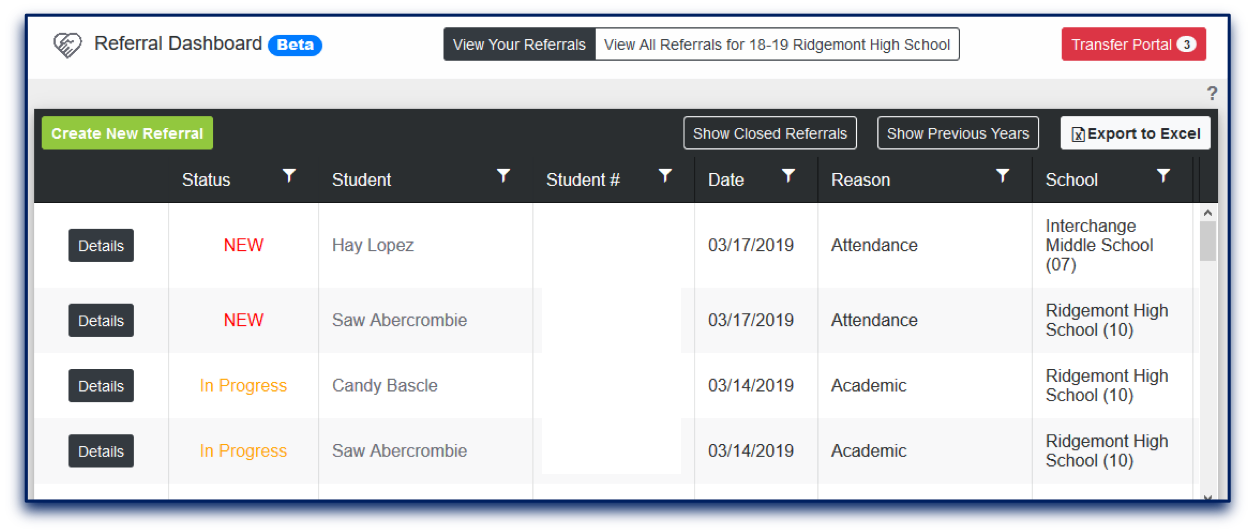
Staff with the necessary tool rights may also create referrals without first initiating a concern by using the Referrals section of the SWARM outline links.
If configured in SWARM settings, some users may also have an option to view all referrals for their assigned location(s).
If a user with appropriate tool rights clicks the “details” button to the left of a referral, s/he will view the referral details screen. At the bottom of this screen – most of which contains the same information as the "create new referral" page discussed previously – two additional sections will display: case notes and feedback.

To add case notes to a referral, click the "add" button in the case notes section of the referral details page.
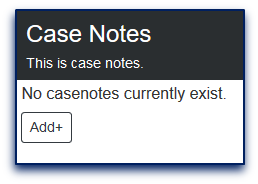
The following screen will appear:
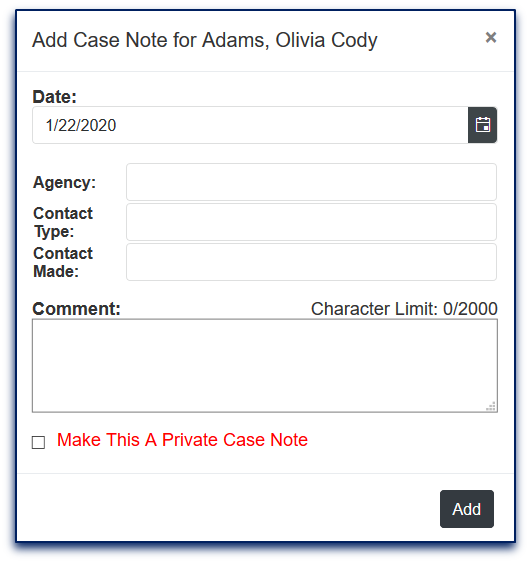
Select an agency, contact type, and contact made, if appropriate for the note; however, the comment text field is required for each new case note. In addition, a case note may be made private by marking the check box in that area, which will prevent other SWARM users from being able to view this case note even if they have been given rights to view others' case notes. When all fields appropriate to the case note and the comments have been added, click the "add" button to save the case note.
The feedback area of the referral details screen allows for communication to anyone who can see all referrals but not others' case notes (or when a case note is marked "private" and no one other than the case note creator can view the note).
To add feedback to a referral, click the "add" button in the feedback section of the referral details page.
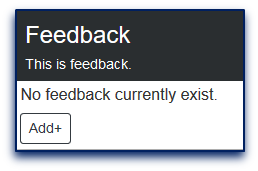
The following screen will appear:
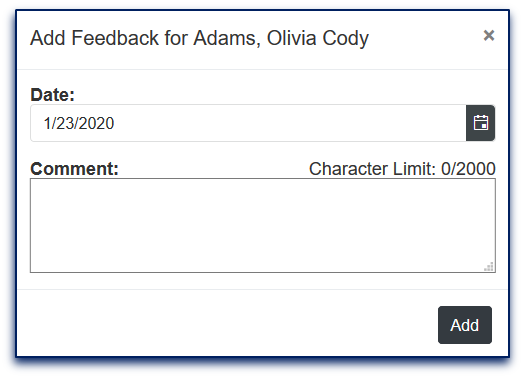
Add text to the comment field, then click the "add" button. Anyone with access to view this referral will now be able to read the feedback comment.
Transfer Portal
The Transfer Portal button at the top of the Referral Dashboard indicates whether action is needed pertaining to students with open cases who have either transferred within district or withdrawn for another school system.
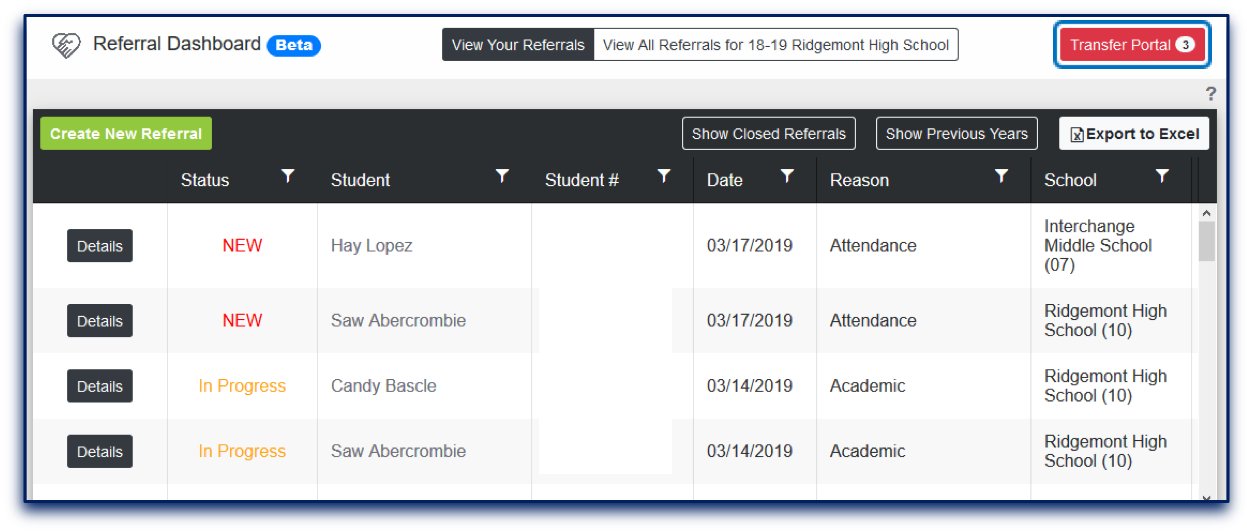
If the Transfer Portal button is clicked, the user will be taken to the dashboard for that area. Clicking the “Close Referral” button for the withdrawn students or the “Transfer Referral” button for the transfers students within the district, the user may take the appropriate action for each type of case.
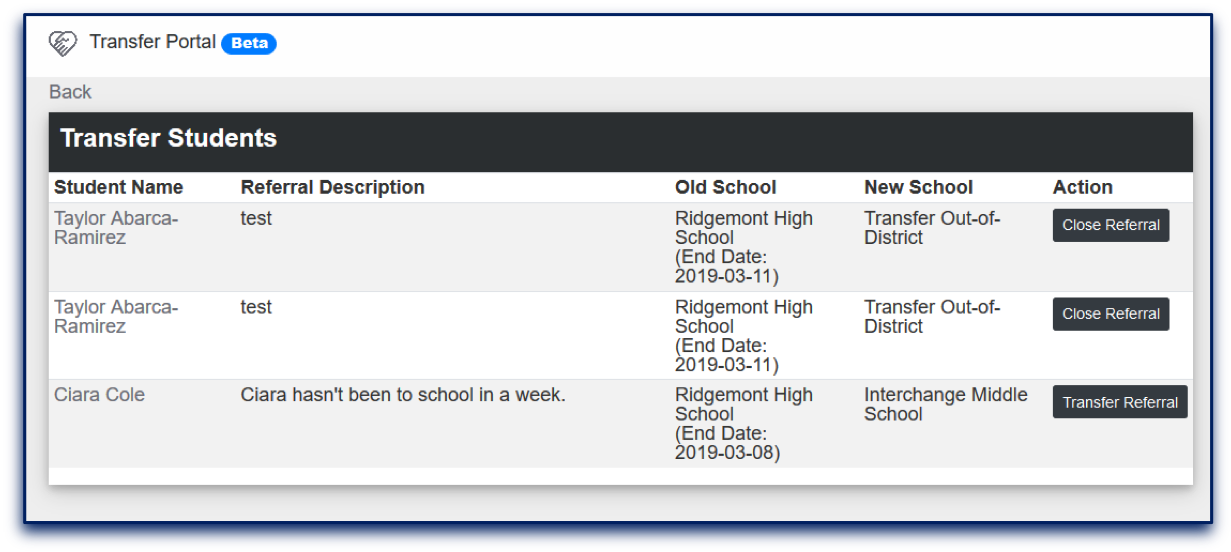
It is recommended that SWARM users with cases in transfer portal status add any case notes, feedback, and actions using the details button of the referral dashboard as usual before changing the referral's status in the transfer portal. Once a case has been closed or transferred to another social worker in the transfer portal, the user that has transferred the case will no longer be able to add information to the referral.
For any referral in the transfer portal displaying the "close referral" button, the student to whom the referral pertains has withdrawn from the school district. After clicking the "close referral" button, the following screen will display:
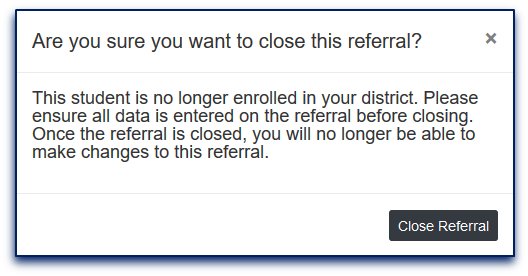
After clicking the "close referral" button, the case will be removed from the transfer portal.
Any referral found in the transfer portal showing the "transfer referral" button indicates a case pertaining to a student that has moved schools within the school district. Clicking the "transfer referral" button returns the following dialog box:
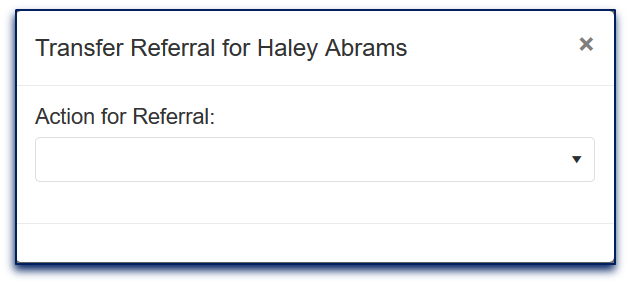
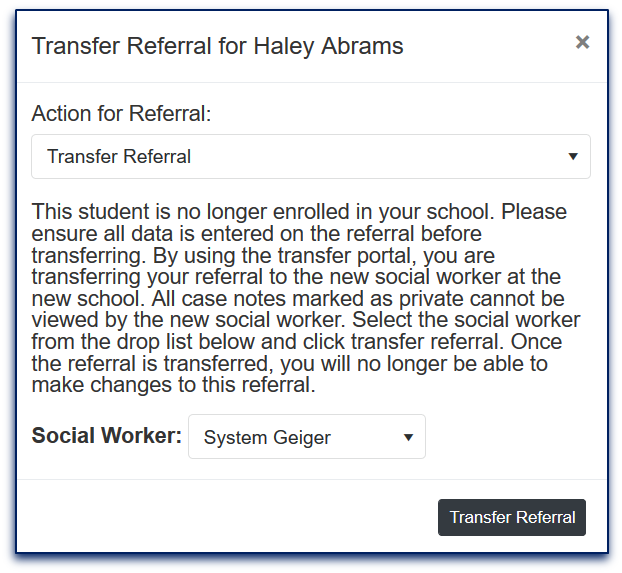
The droplist beneath "action for referral" contains two options. The first -- "transfer referral" -- is for use when a referral at the student's former school should remain open at the new school. Choosing "transfer referral" from the dropdown list yields another dialog box allowing for the assignment of a social worker specific to the new school.
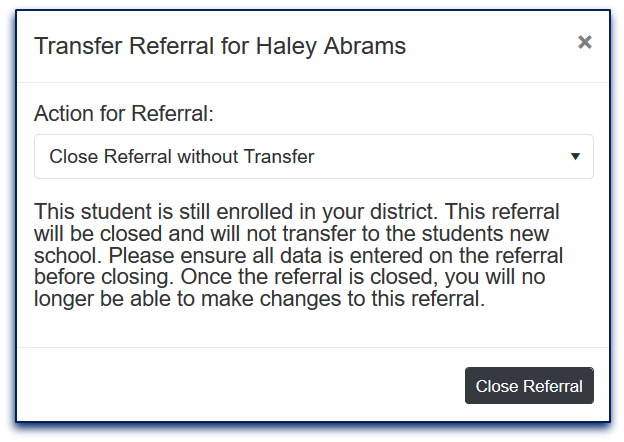
The "close referral without transfer" option on the transfer referral screen is for use whenever it's more appropriate to close a case as the student transitions to the new in-district school:
Sorting, Filtering, and Templates
After navigating to a concern, referral or activity dashboard, a user will view the newest transaction displaying at the top of the list and the oldest at the bottom.

SWARM dashboards are both sortable and filterable. By clicking any column header – the name header, for example – the list will be sorted in alphabetical order.
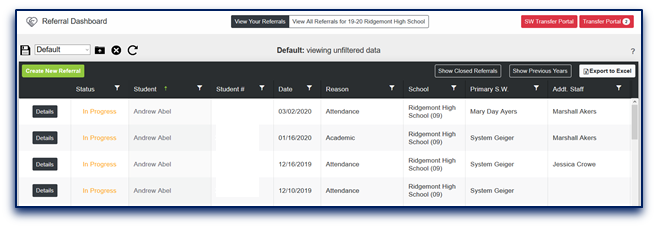
Click the name header again and the list is arranged reverse alphabetically.
Filtering a list reduces the number of entries that display according to selected criteria. Click the funnel-shaped filter icon...

...to set the parameters, followed by the “filter” button, and only referrals meeting the requested conditions will appear.
Users are able to build templates within SWARM dashboards to prevent the need to manually recreate often-used filters.
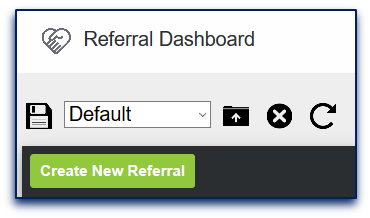
To create a new template, first sort/filter the dashboard list so it displays in the preferred order. Next, click the floppy disk icon...

...at the top of the page to name the template being created. (Staff with admin rights to SWARM will have an additional choice to create a global template for all SWARM users.)
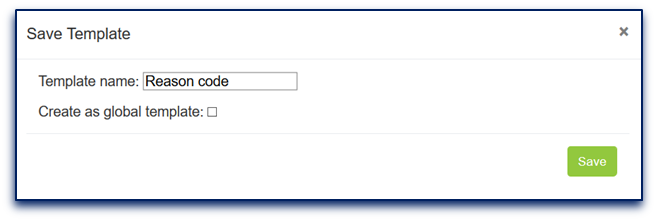
After the “save” button is clicked on this screen, the template will be available on the dashboard’s template dropdown list. To load the template, select its name, then click the file folder icon to the right of the droplist:

The template will load, at which point the referrals list will appear in the desired order and the header will show both the template name and the activated filters.
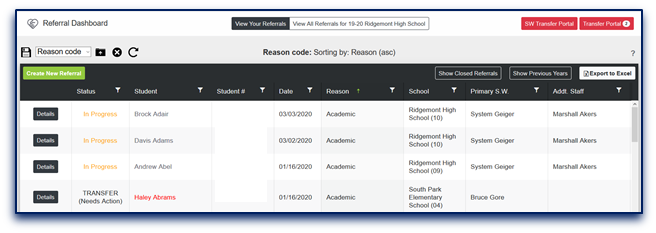
Other choices in the template area include a “delete” option...

...that will remove a template from the list, and a round arrow symbol...

...that resets the dashboard to its default template.
By Email:
By Phone: (706) 520-1125
A representative from our support team will respond to you as soon as possible.
