Settings
Settings are school specific. Each school can have a different setup to allow for unique positive and minor behavior options appropriate for the school.
General Options
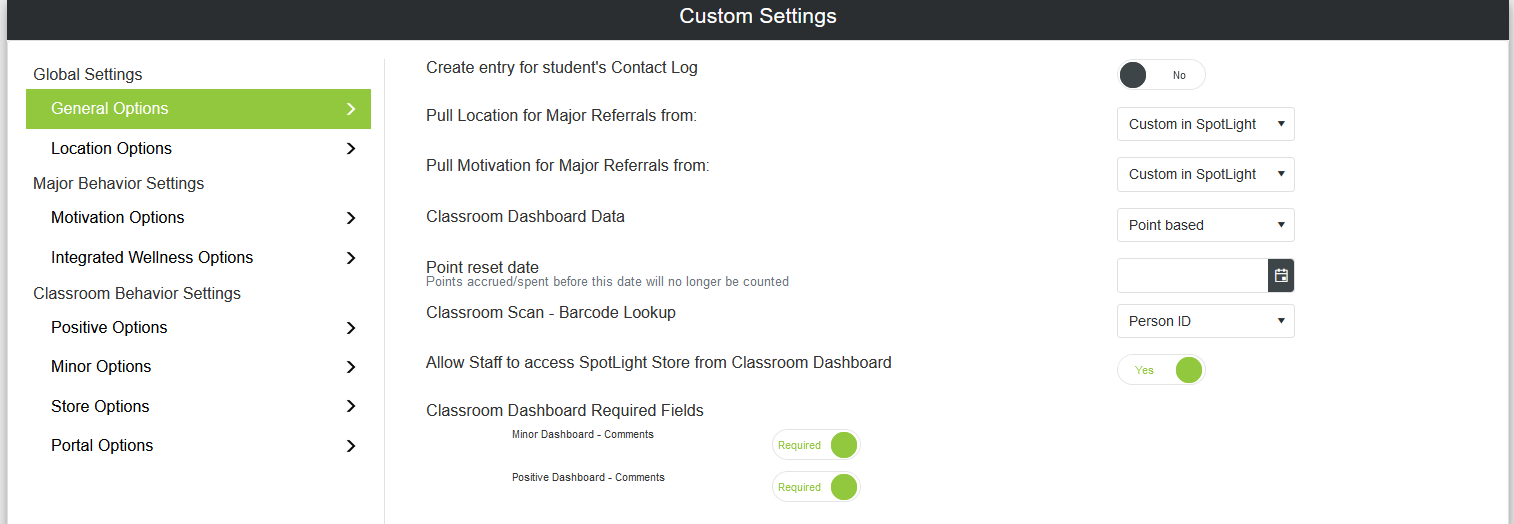
Control general settings for SpotLight, such as whether to publish entries to the Contact Log, where to pull Location or Motivation data from, which fields are required on minor/positive behaviors, whether Classroom data should be displayed based on incidents or points, and the option to reset points if needed.
(Note: If locations or motivation are set to pull from "Custom in SpotLight," remember to create the locations and motivation under their respective settings.)
Location Options
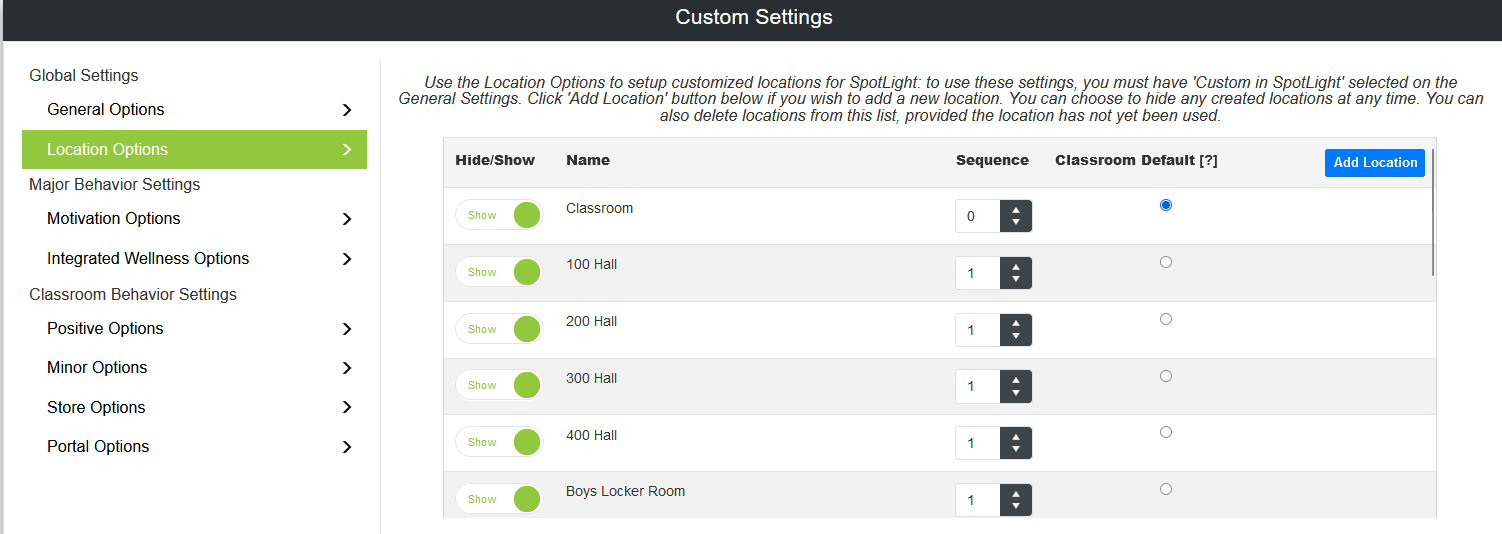
If your district does not use Location categories within Infinite Campus, use this to create customized Location categories. These settings are school specific.
Add Location
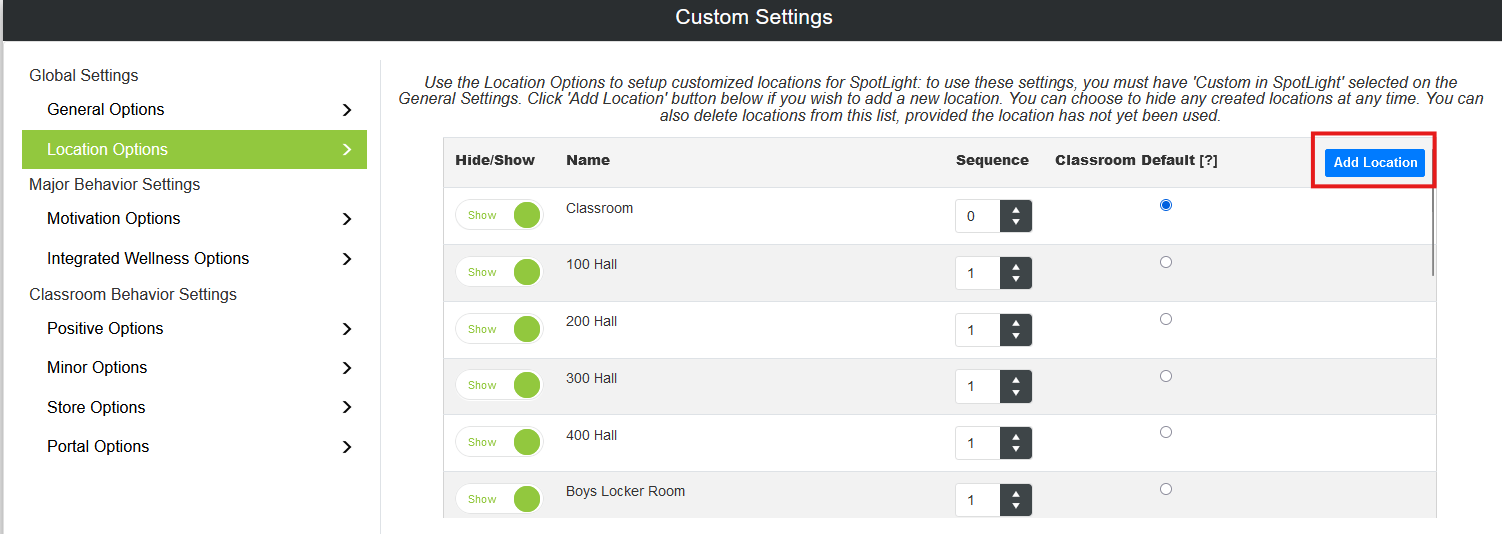
To add a location, click the Add Location button.
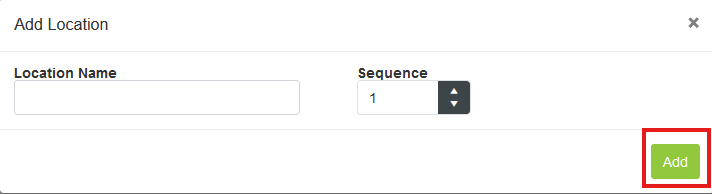
Enter the location name, sequence, and click Add. If no sequence is added or they are all left the same, the list will display alphabetically.
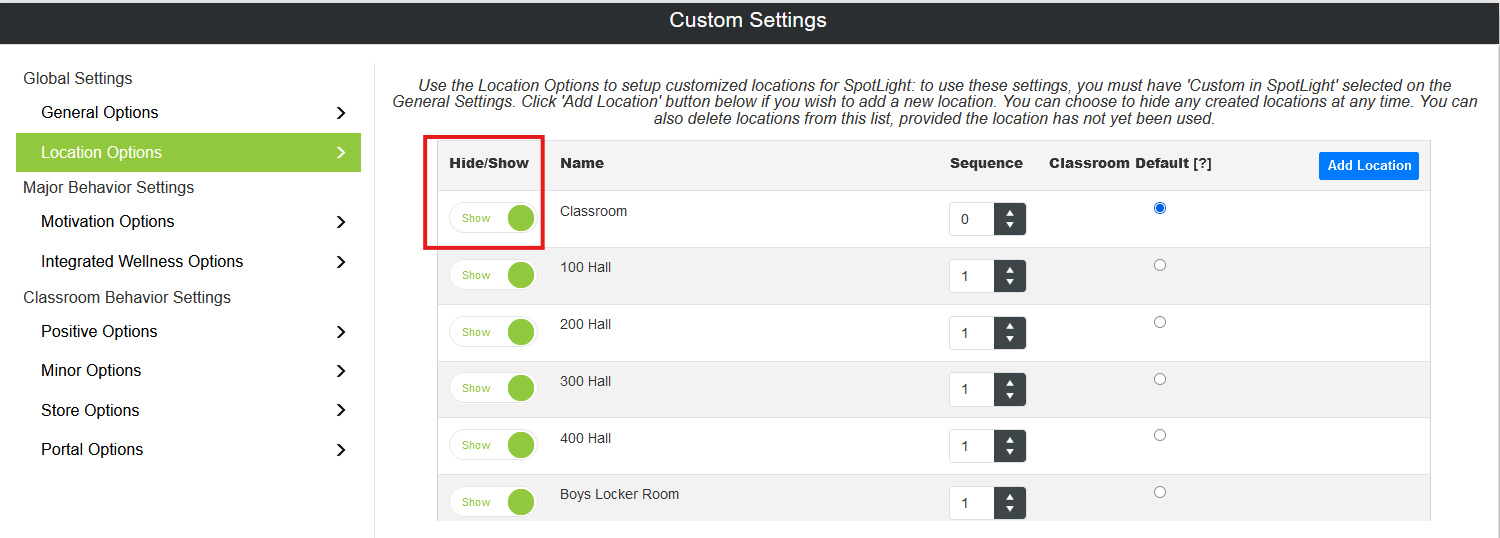
Hide/Show Location
To hide/show locations, use the toggle next to the location and click save.
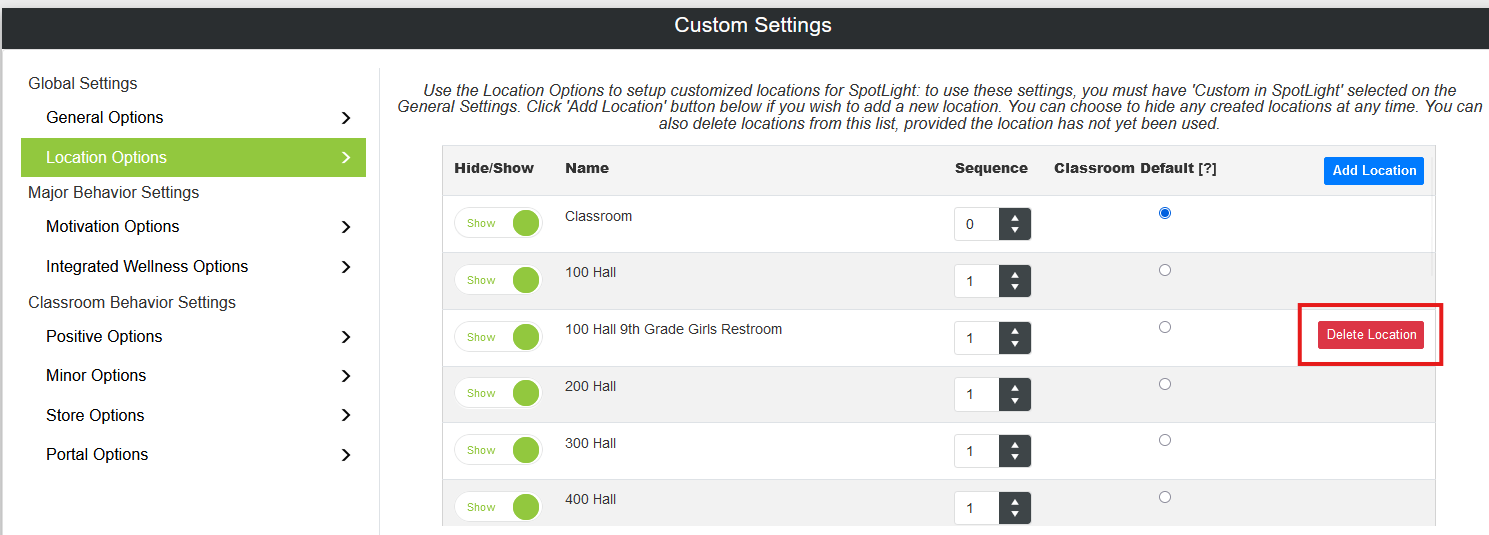
Delete Location
If a location has not been used in SpotLight, the Delete Location button will be available. To delete an unused location, click Delete Location and then click Okay to confirm.
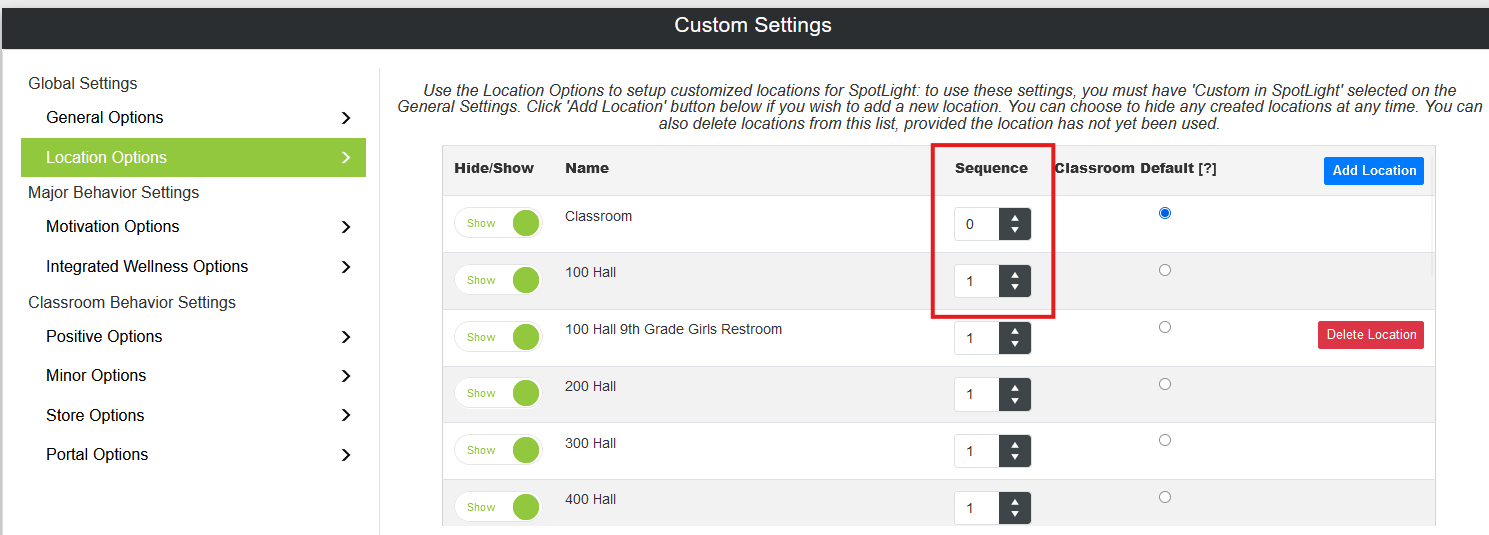
Sequence
The sequence will determine the order that the locations appear in the drop list for the end user. To set the sequence for the location, select the number and click save. If sequence is set to 1 for all locations, they will be sorted alphabetically.
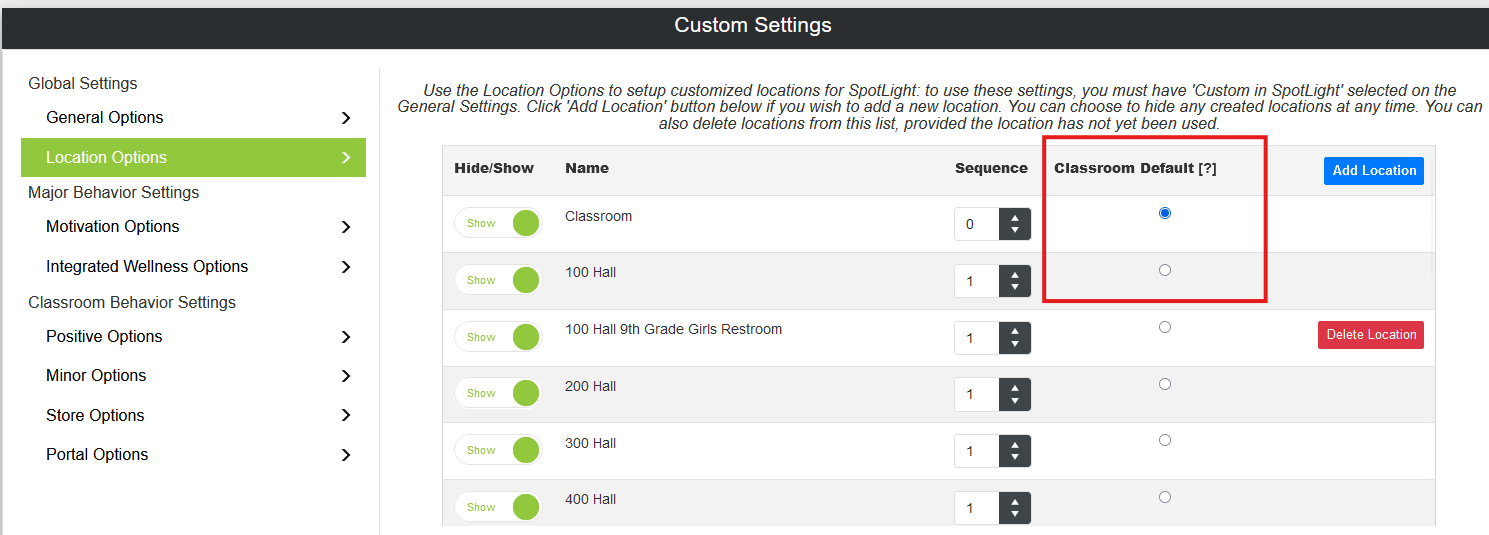
Classroom Default
When using the Classroom module of SpotLight, whether through Classroom or Classroom Focus, the location will default to the location that is marked.
Motivation Options
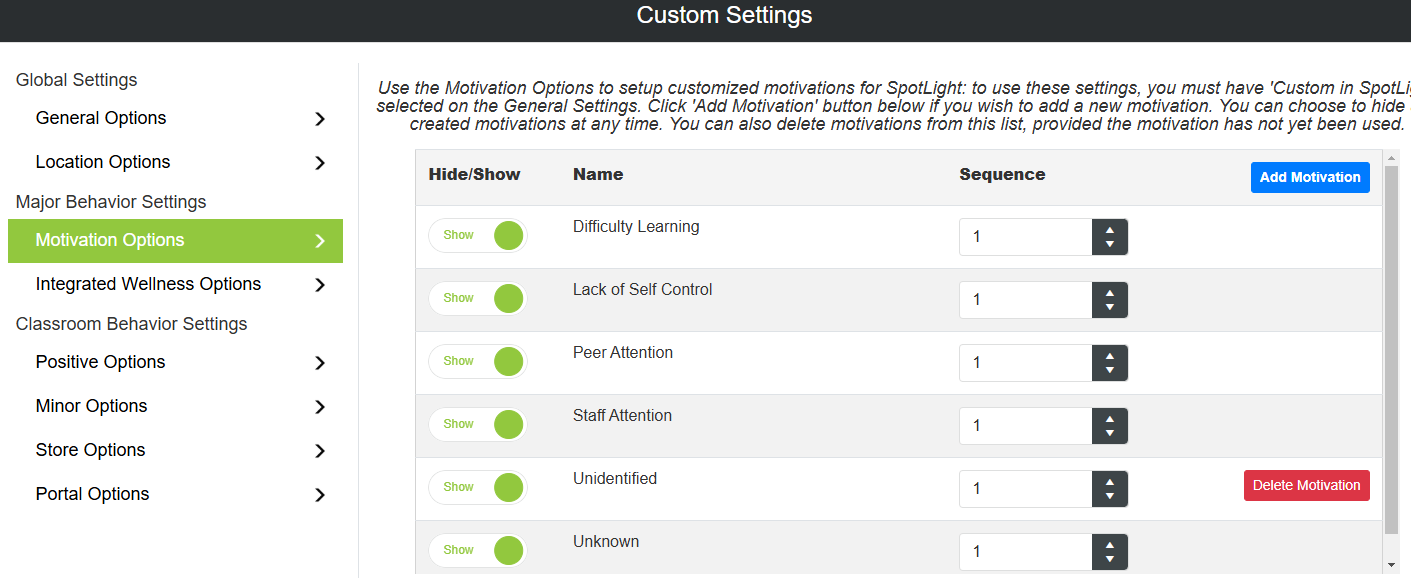
If your district does not use Motivation categories within Infinite Campus behavior, this can be used to create customized Motivation categories.
Add Motivation
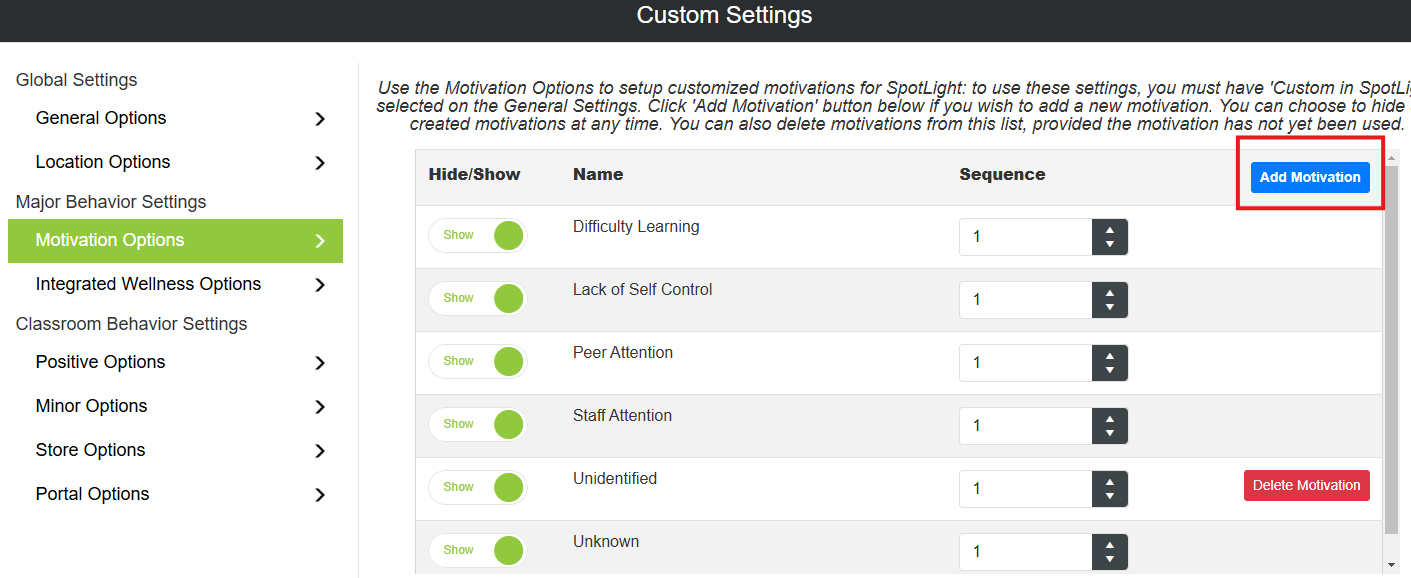
To add motivation, click the Add Motivation button.
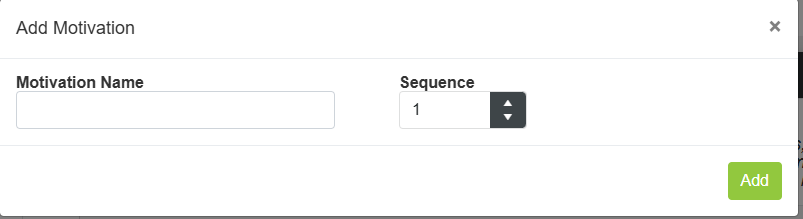
Enter the motivation name, sequence and click Add.
Hide/Show Motivation
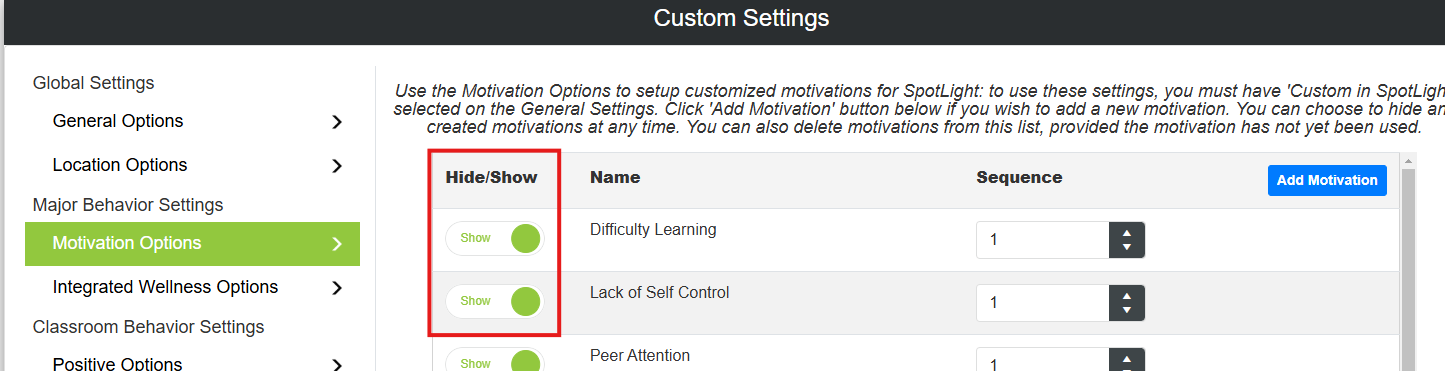
To hide/show motivations, use the toggle next to the motivation and click save.
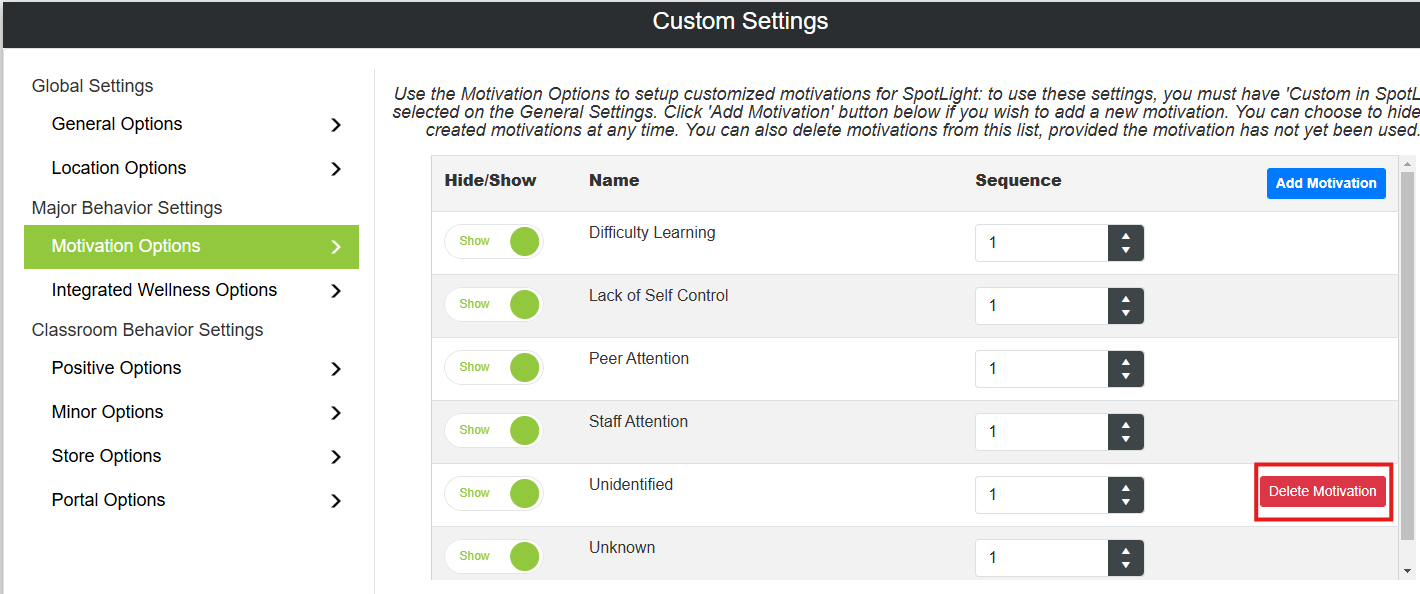
Delete Motivation
If motivation has not been used in SpotLight, the Delete Motivation button will be available. To delete an unused motivation, click Delete Motivation and then click Okay to confirm.
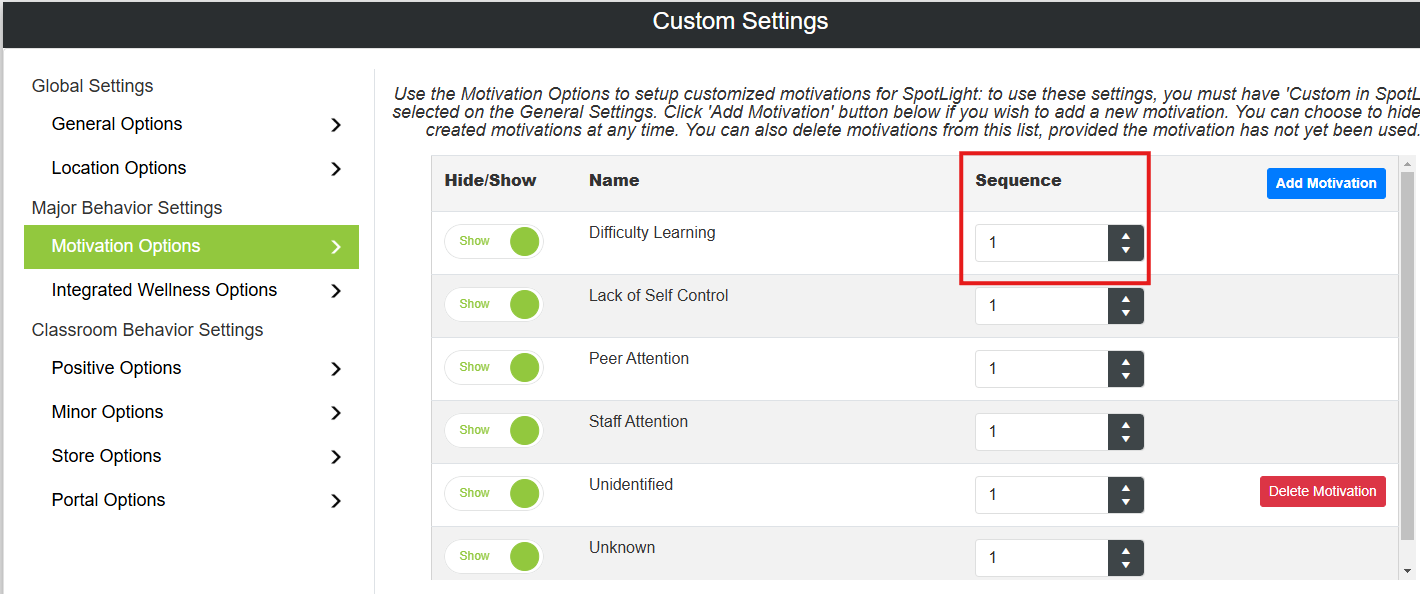
Sequence
The sequence will determine the order that the motivations appear in the drop list for the end user. To set the sequence for motivation, select the number and click save. If sequence is set to 11 for all motivations, they will be sorted alphabetically.
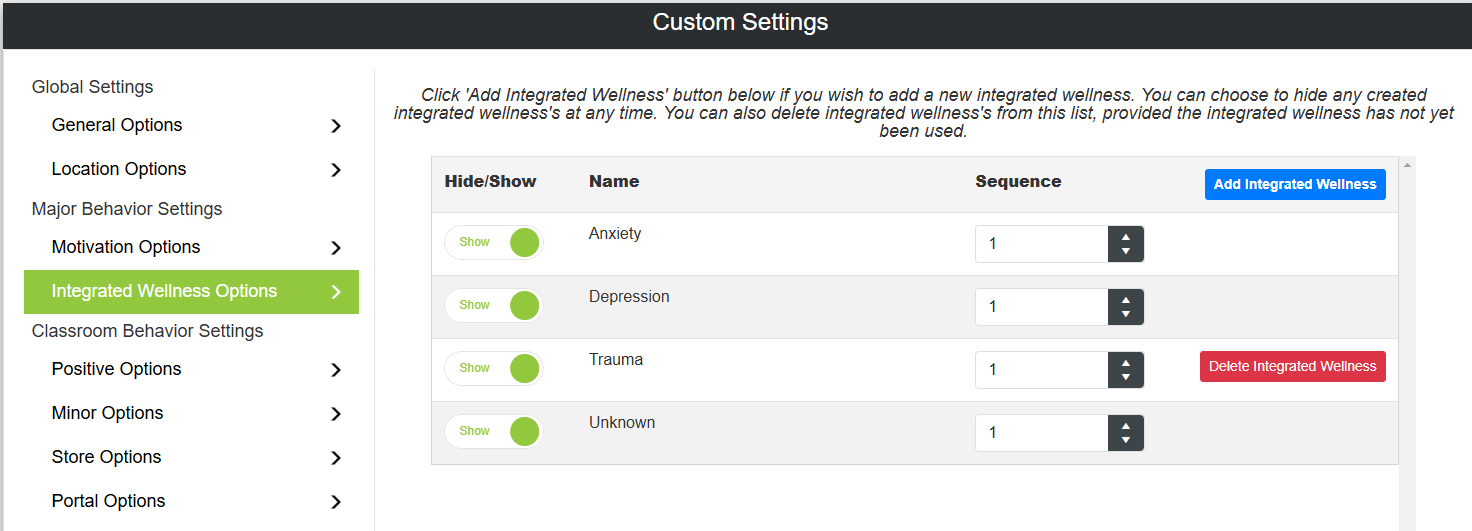
Integrated Wellness Options
If your district does not use Integrated Wellness categories within Infinite Campus, use this to create customized Integrated Wellness categories.
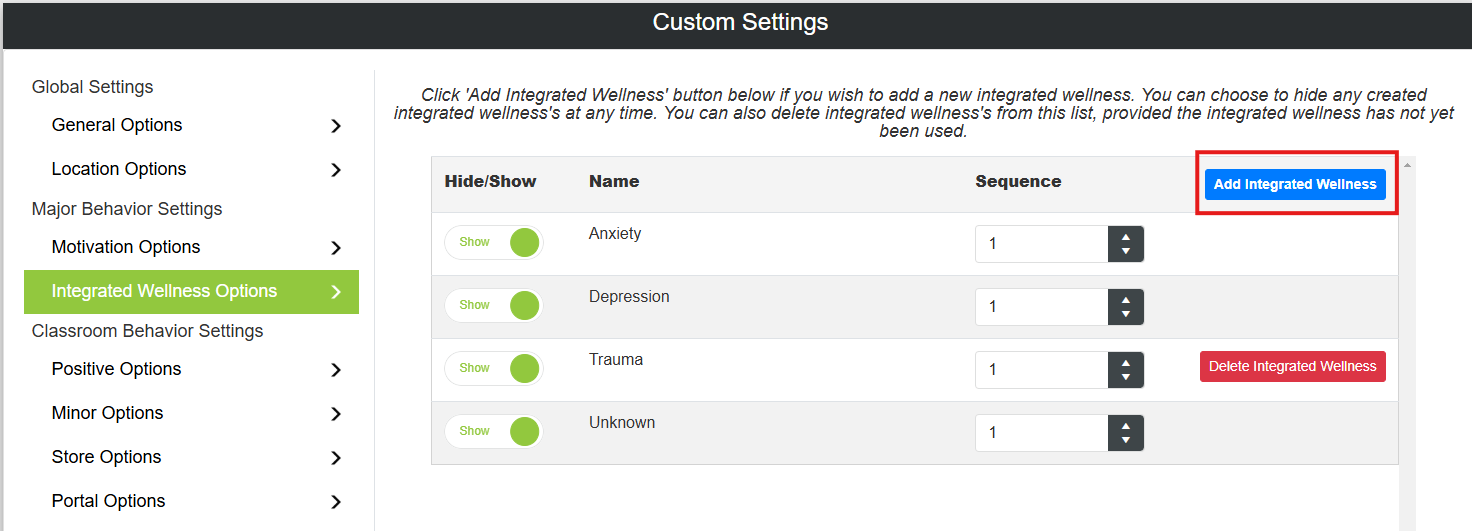
Add Integrated Wellness
To add an Integrated Wellness option, click the Add Integrated Wellness button.
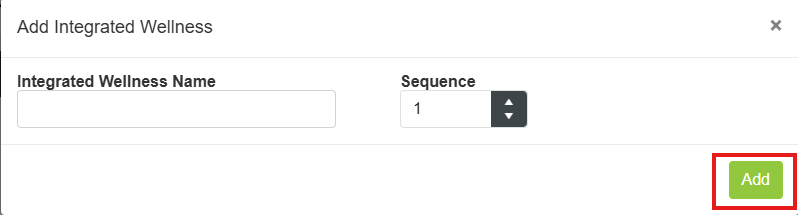
Enter the Integrated Wellness name, sequence and click Add.
Hide/Show Integrated Wellness
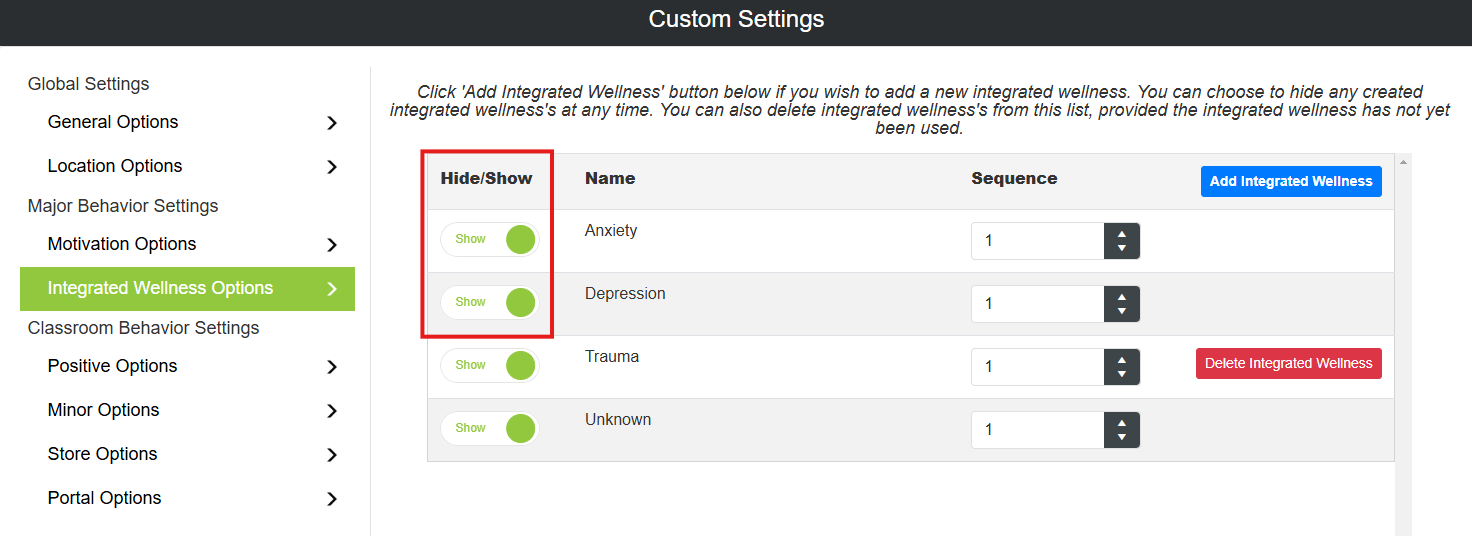
To hide/show an Integrated Wellness option, use the toggle next to the option and click save.
Delete Integrated Wellness
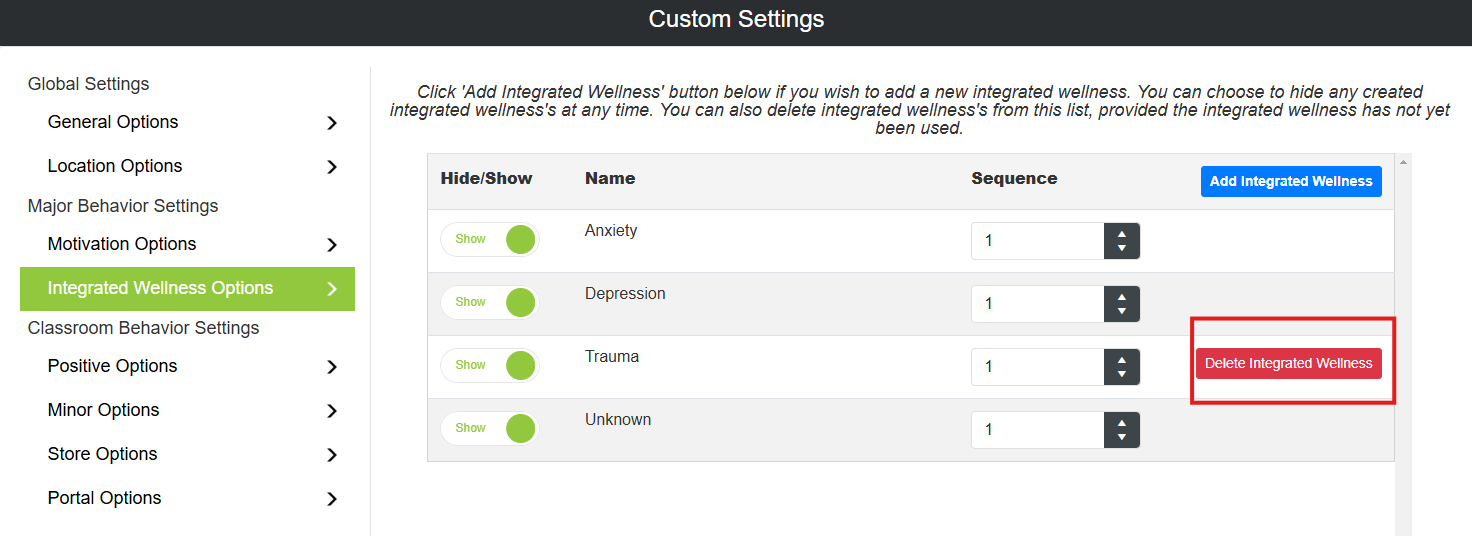
If an Integrated Wellness has not been used in SpotLight, the Delete Integrated Wellness button will be available. To delete an unused Integrated Wellness, click Delete Integrated Wellness and then click Okay to confirm.
Positive Options
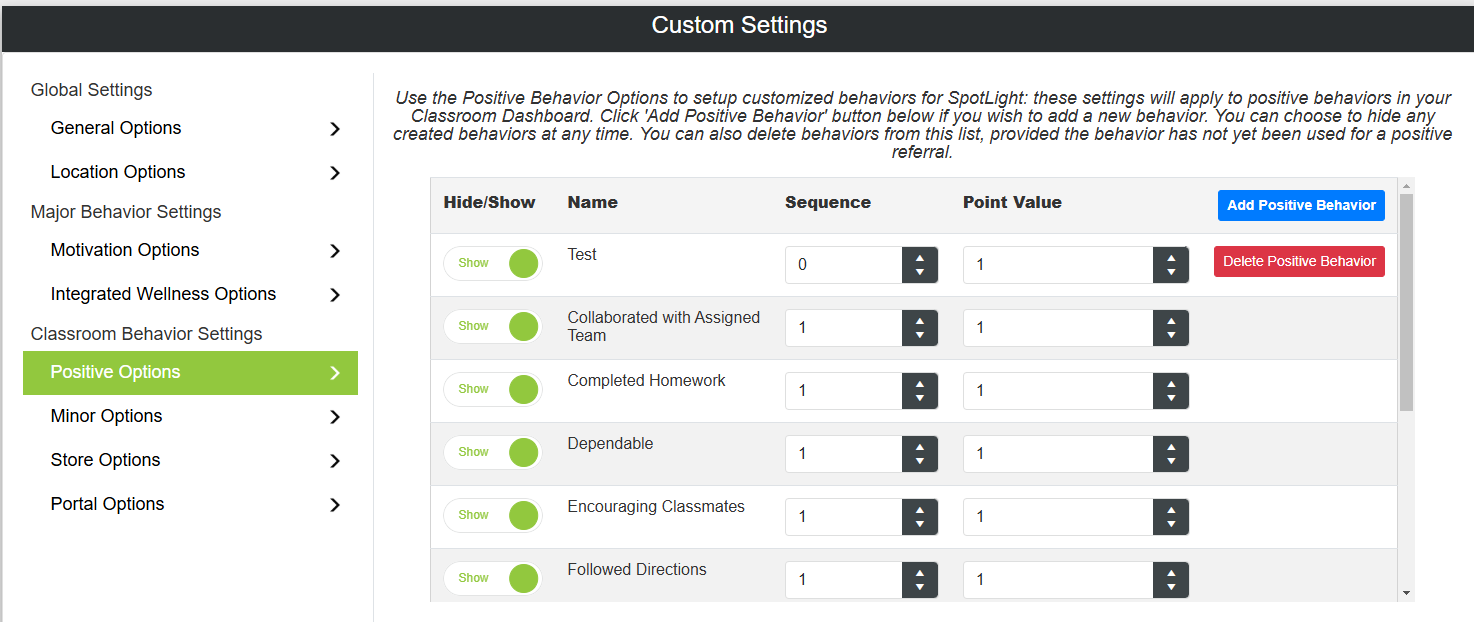
Create customized Positive Behavior categories for your district.
Add Positive Behavior
To add positive behavior, click the Add Positive Behavior button.
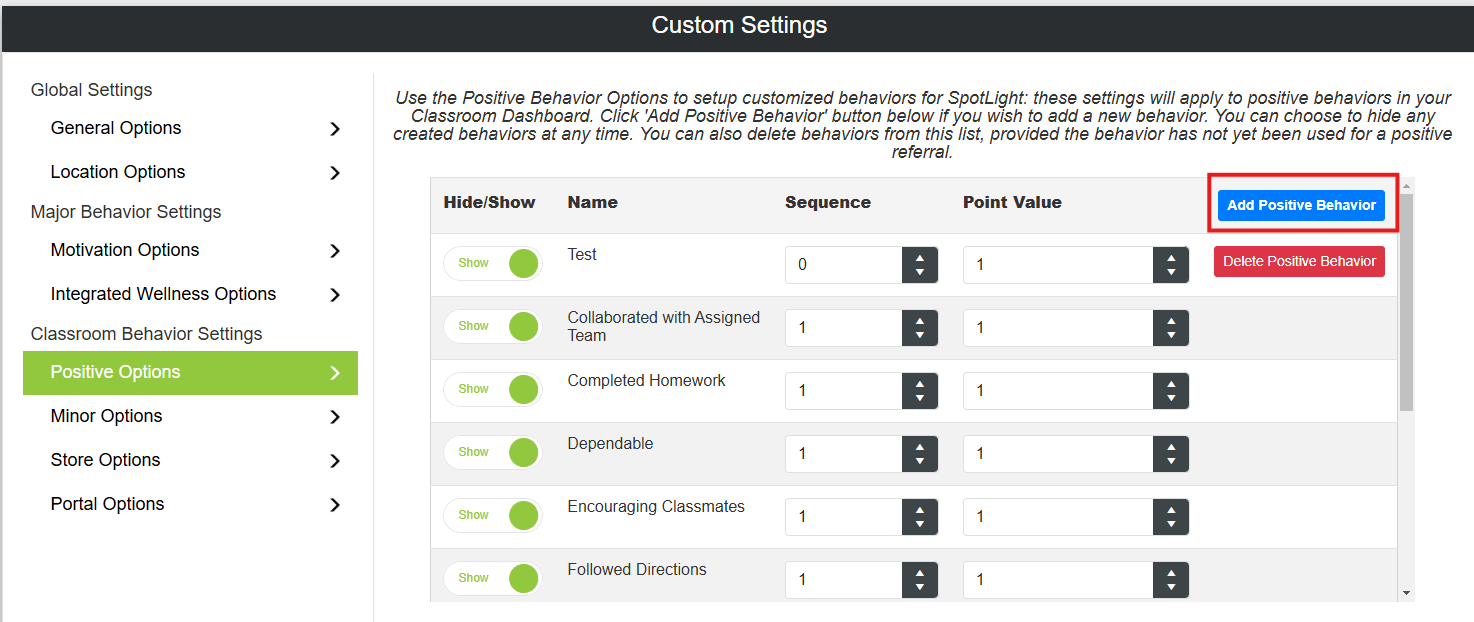
Enter the positive behavior name, sequence and point value and then click Add.
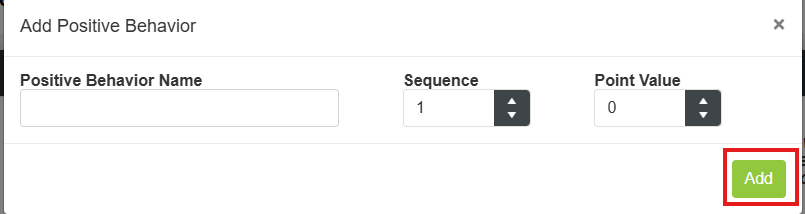
Hide/Show Positive Behavior
To hide/show a Positive option, use the toggle next to the option and click save.
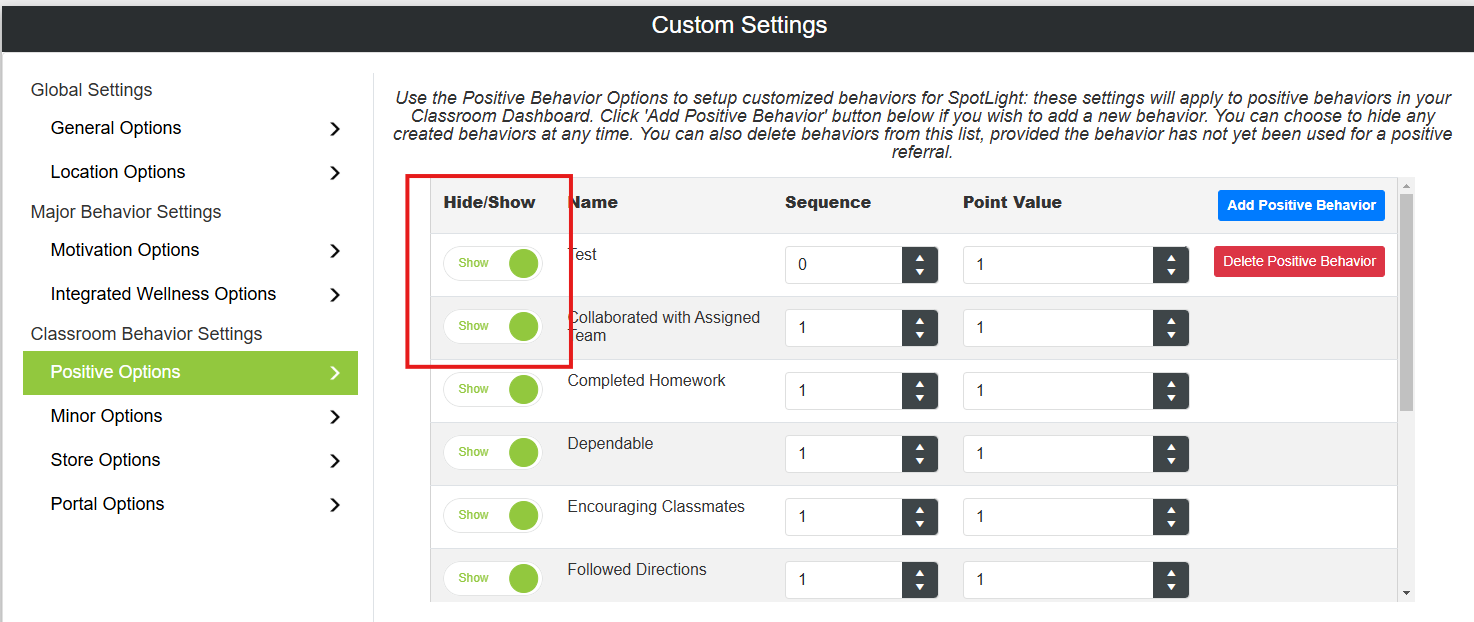
Delete Positive Behavior
If positive behavior has not been used in SpotLight, the Delete Positive Behavior button will be available. To delete an unused positive behavior, click Delete Positive Behavior and then click Okay to confirm.
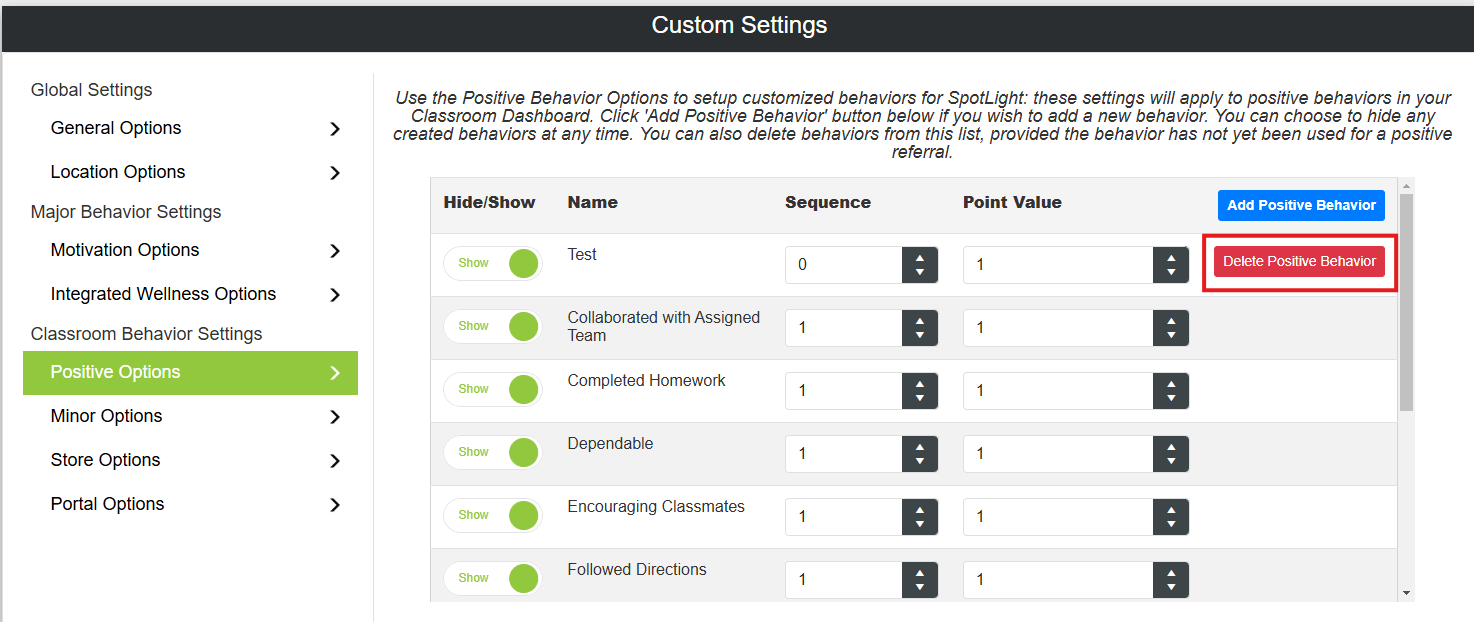
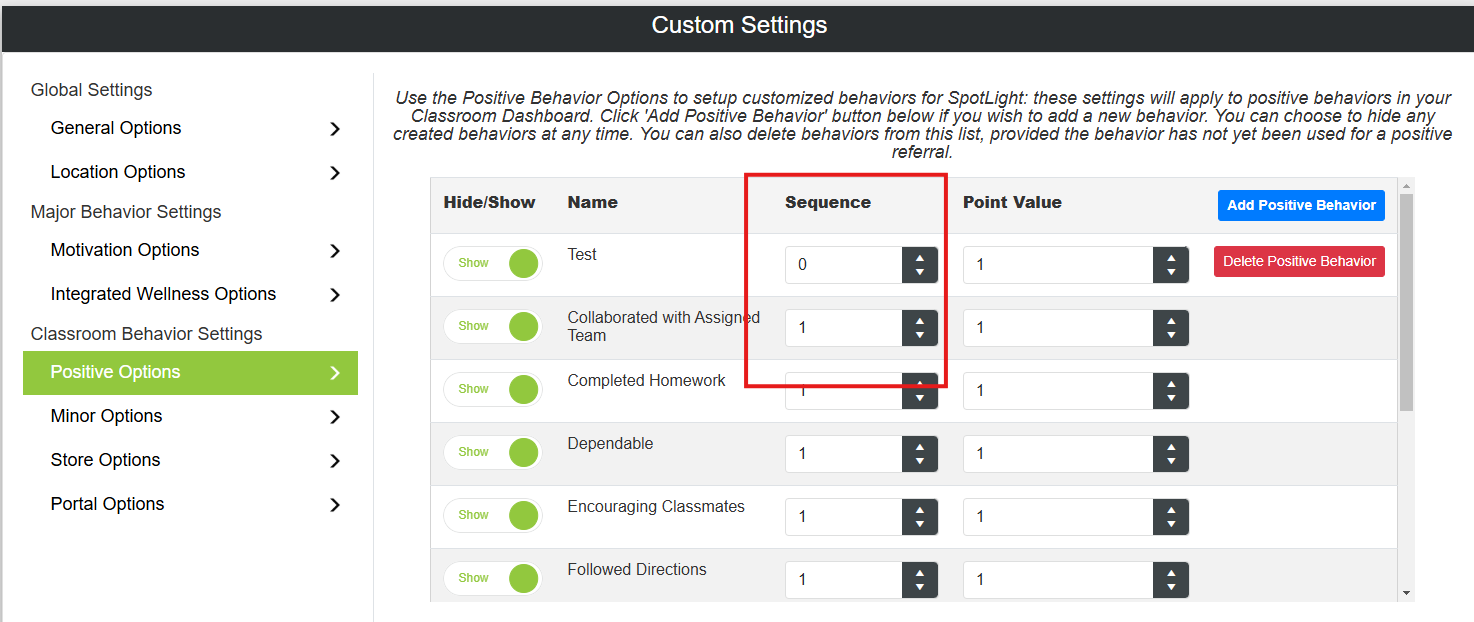
Sequence
The sequence will determine the order the Positive options appear in the drop list for the end user. To set the sequence for Positive option, select the number and click save. If sequence is set to 1 for all options, they will be sorted alphabetically.
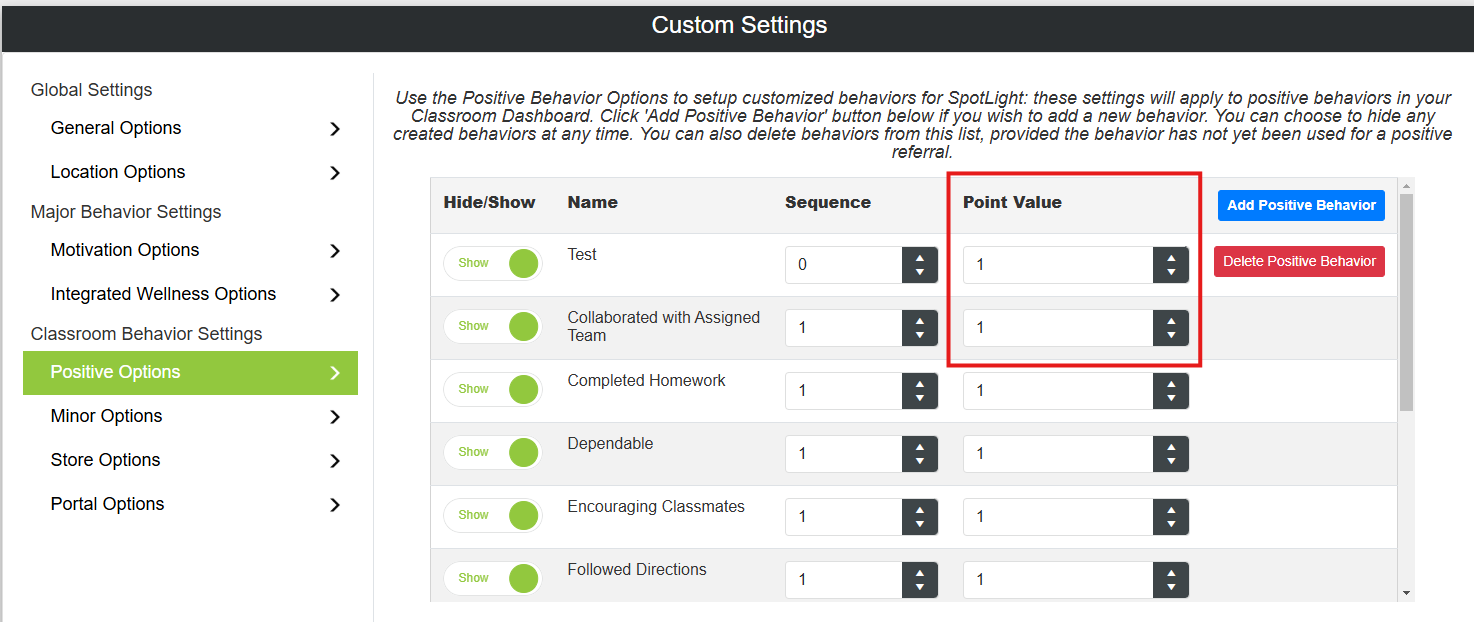
Point Value
If your school is using point value for your Positive behaviors, use this option to assign the point value for the Positive Behavior.
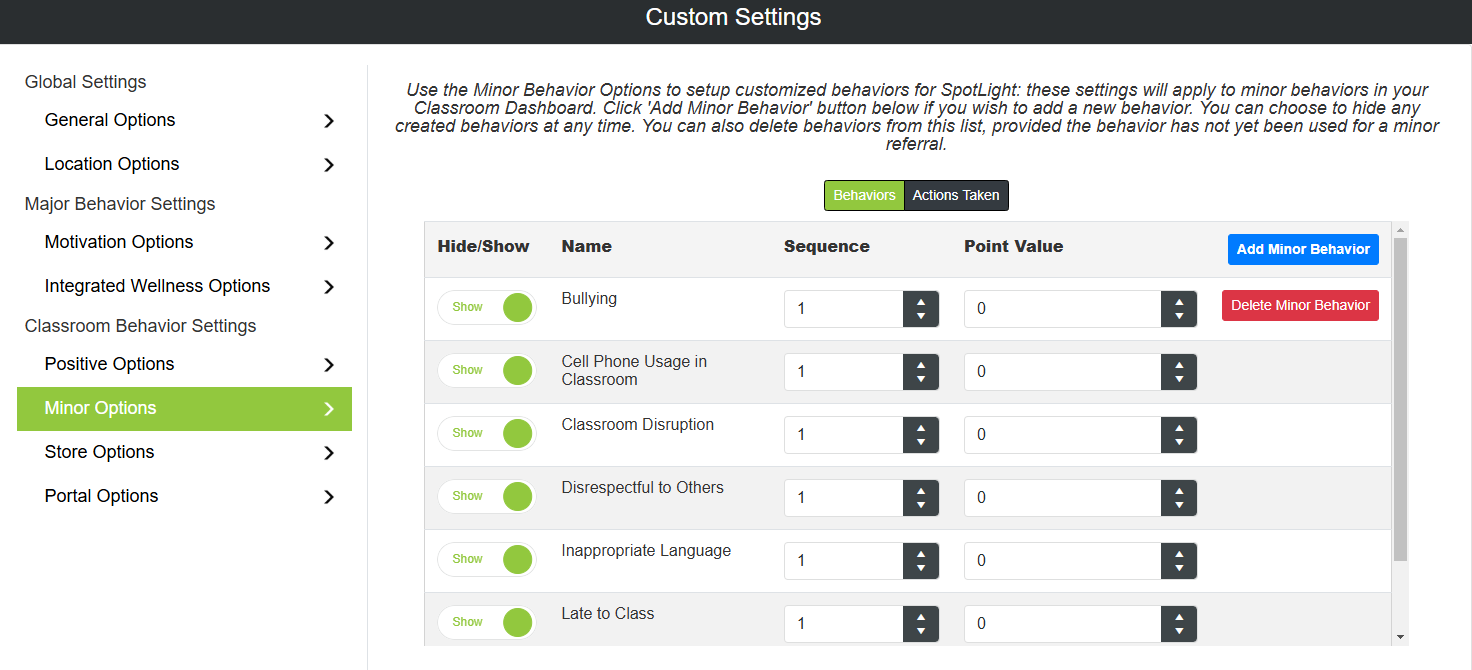
Minor Options
Create customized Minor Behavior categories for your district.
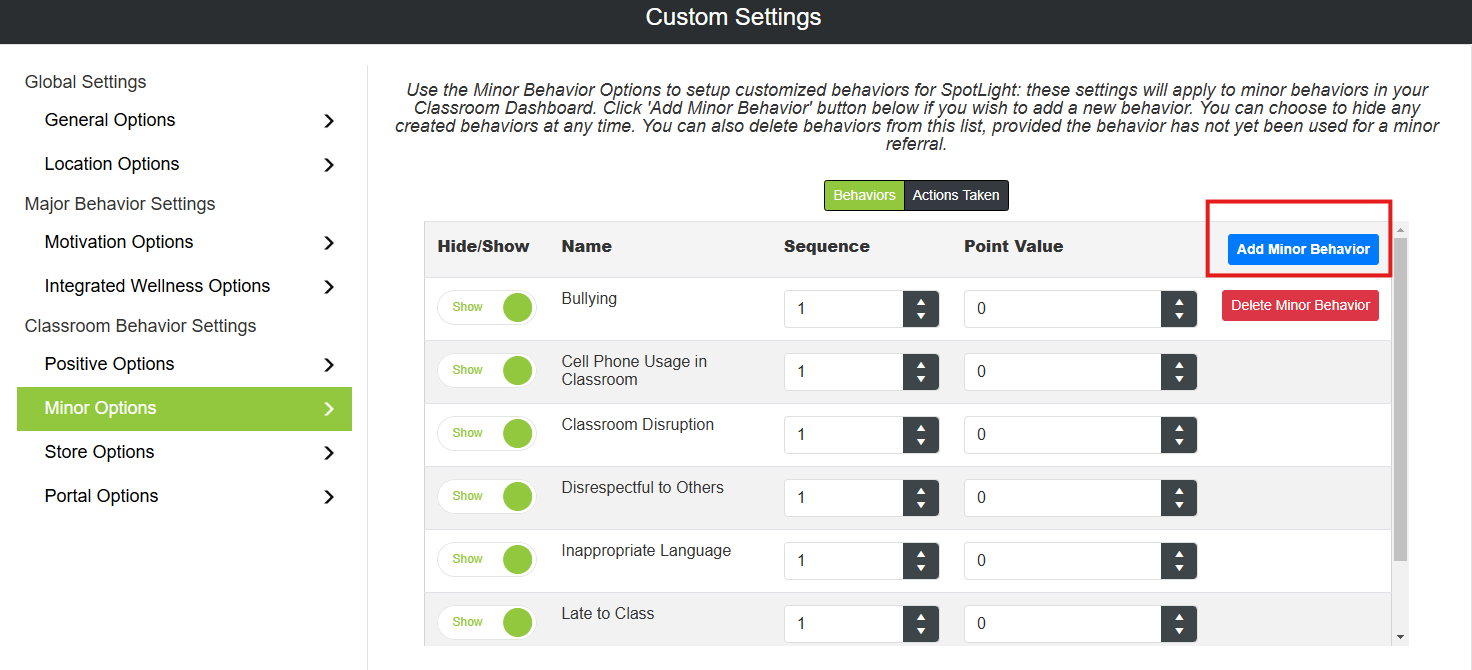
Add Minor Behavior
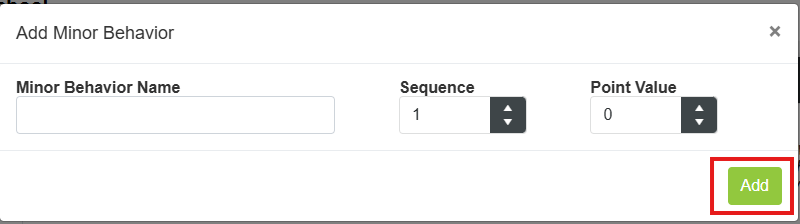
To add a minor behavior, click the Add Minor Behavior button.
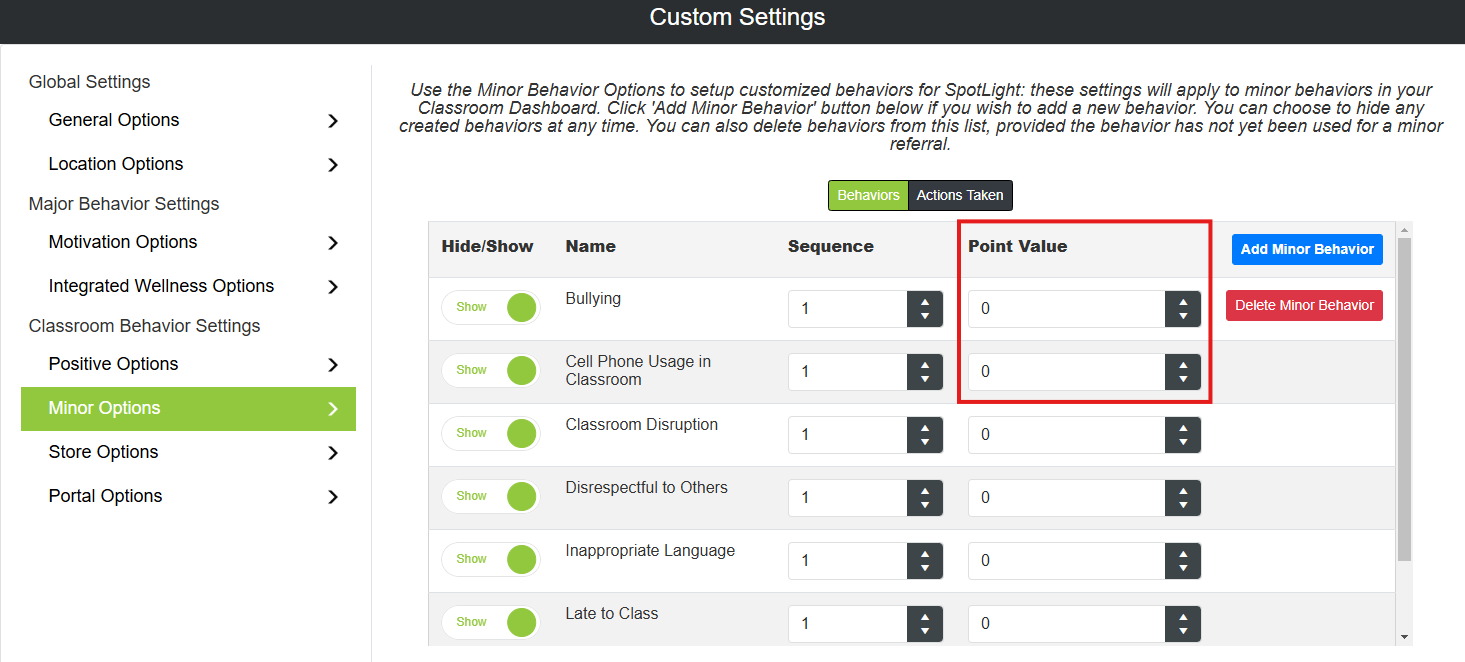
Enter the Minor Behavior name, sequence, point value and then click Add.
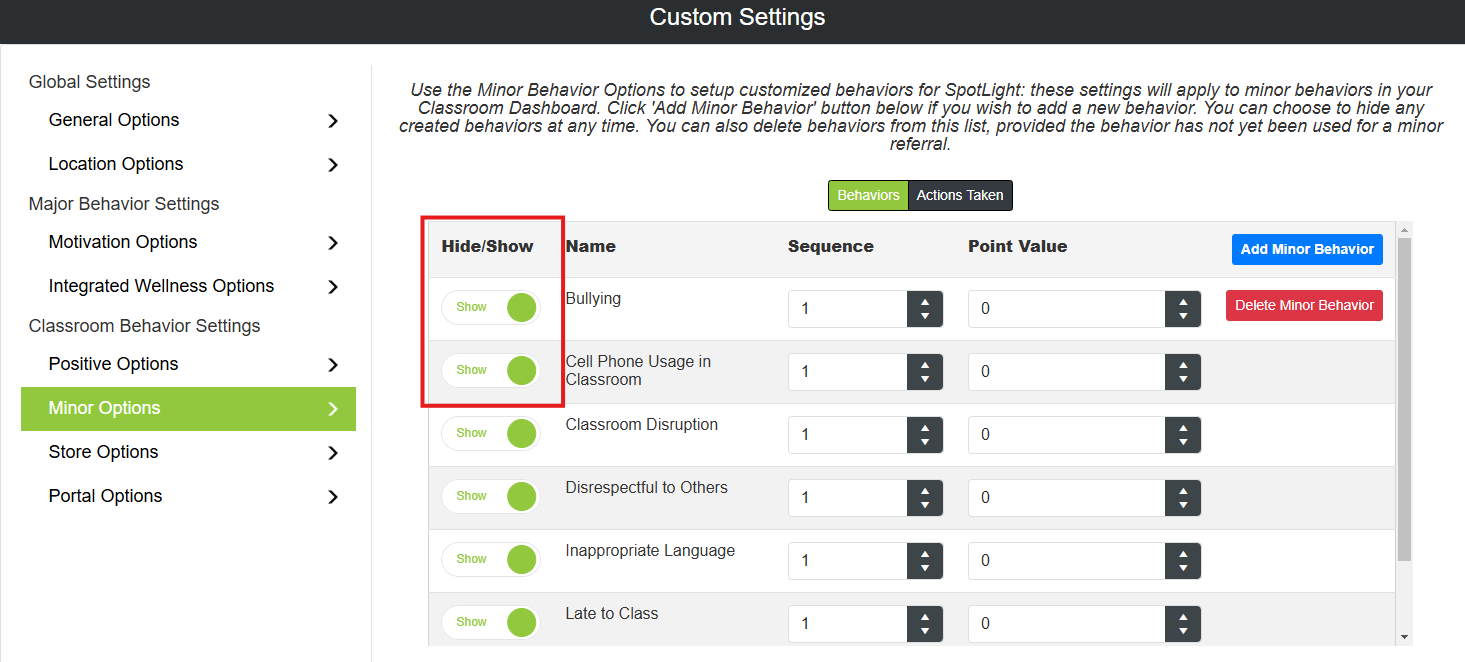
Hide/Show Minor Behavior
To hide/show Minor Behavior, use the toggle next to the option and click save.
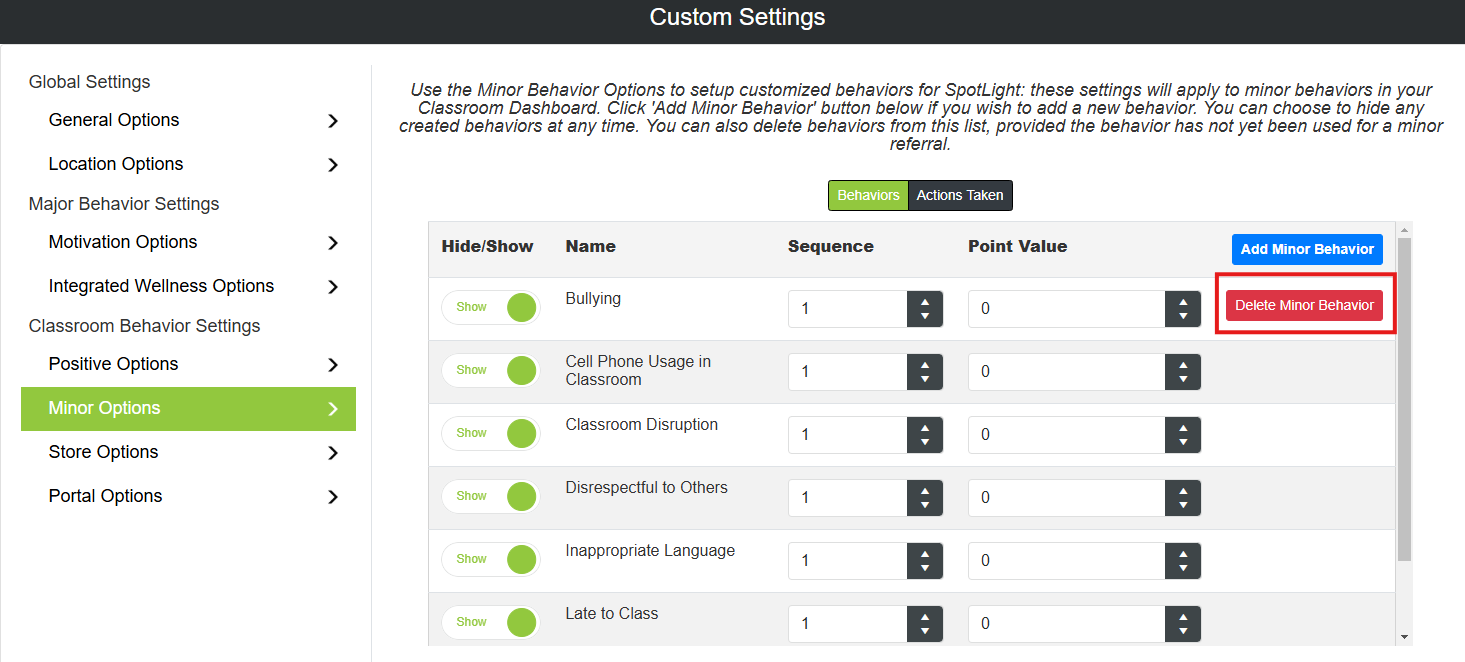
Delete Minor Behavior
If a minor behavior has not been used in SpotLight, the Delete Minor Behavior button will be available. To delete an unused minor positive behavior, click Delete Minor Behavior and then click Okay to confirm.
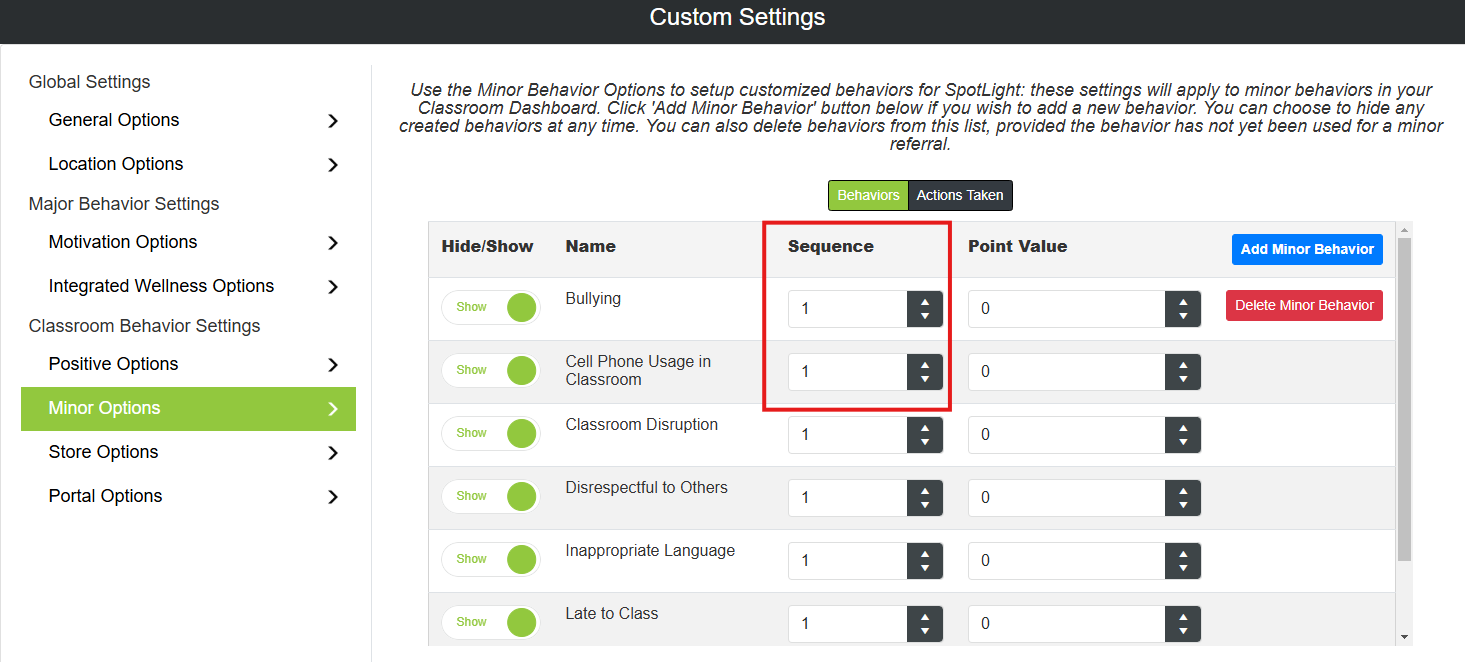
Sequence
The sequence will determine the order the Minor options appear in the drop list for the end user. To set the sequence for the Minor Option, select the number and click save. If sequence is set to 1 for Minor Options, they will be sorted alphabetically.
Point Value
If your school is using point values for Minor behaviors, use this option to assign the point value of Minor behaviors. Minor behavior points will be subtracted from the Positive Points.
Actions Taken
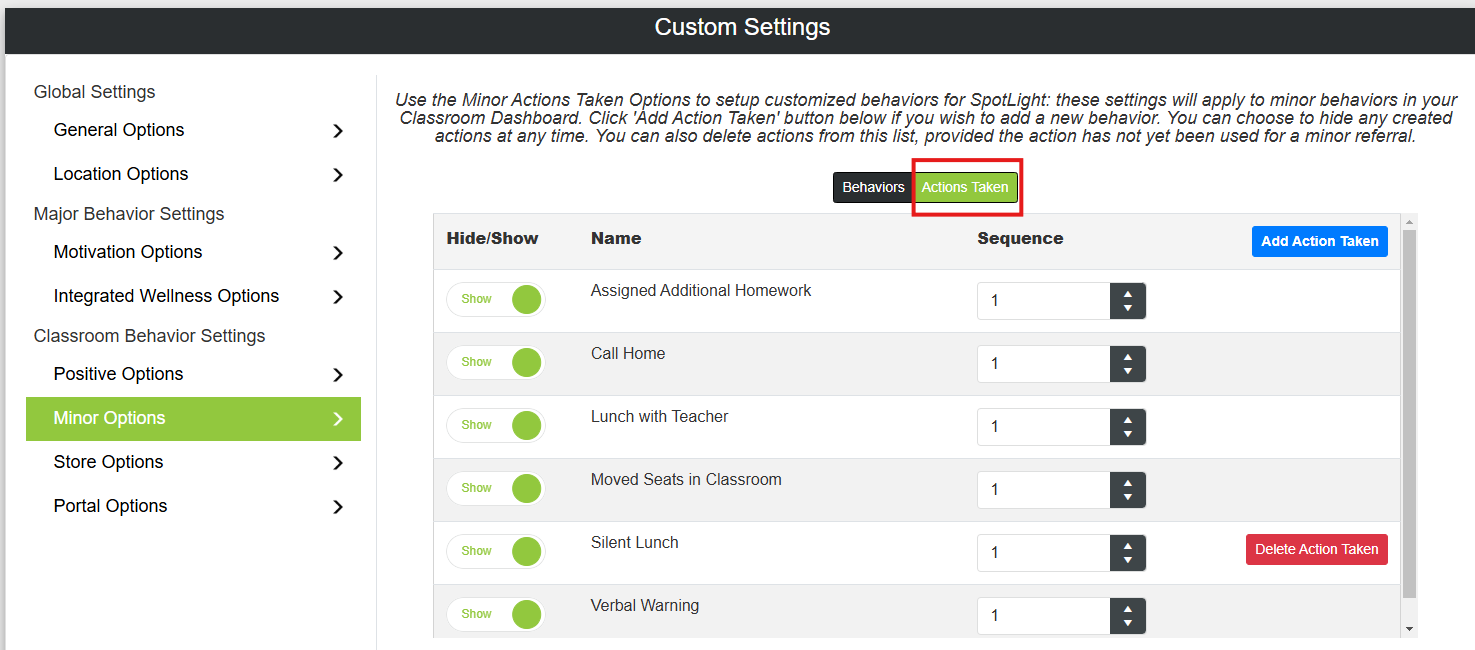
Create customized Actions Taken to pair with the Minor Behaviors.
Add Action Taken
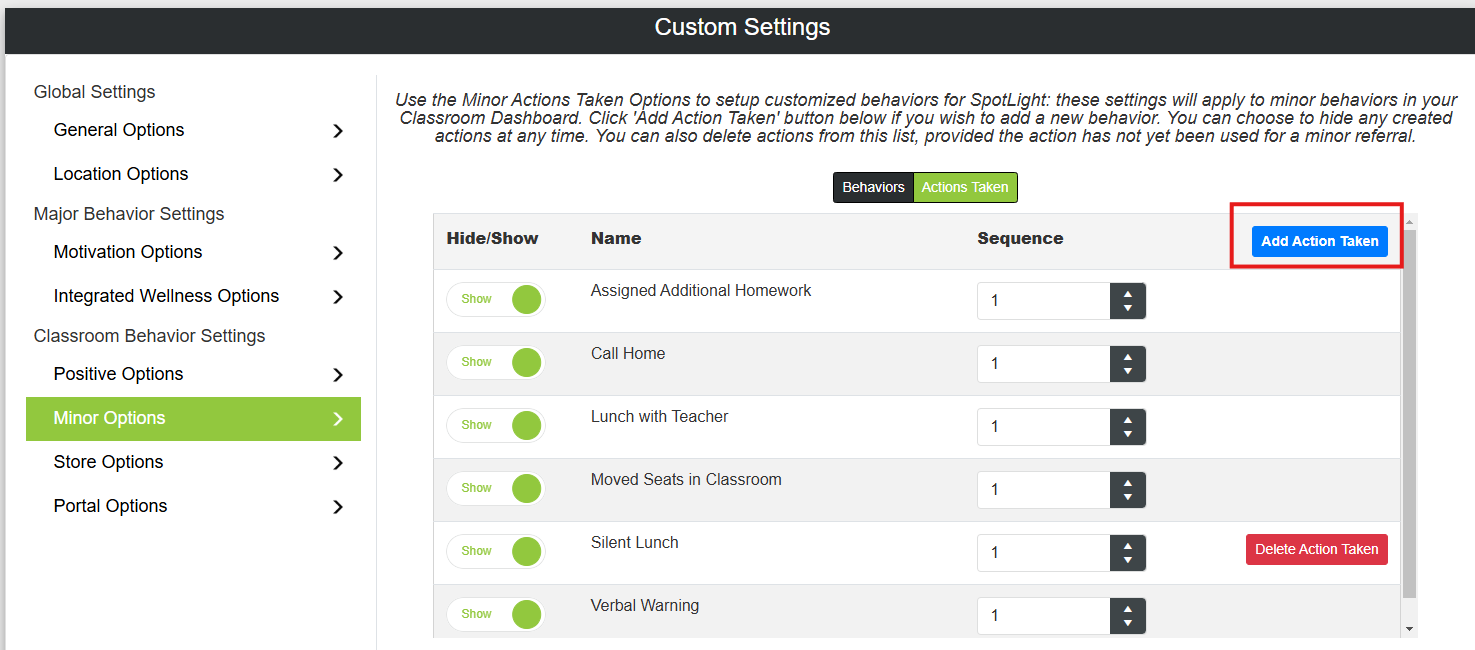
To add an Action Taken, click the Add Action Taken button.
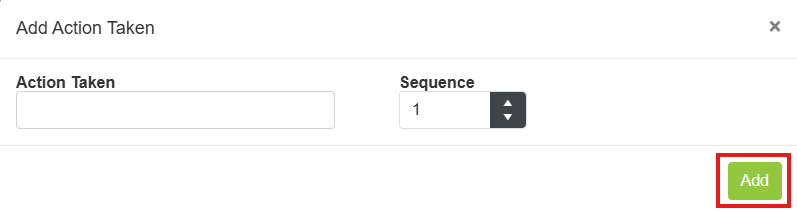
Enter the Action Taken name and sequence, and then click Add.
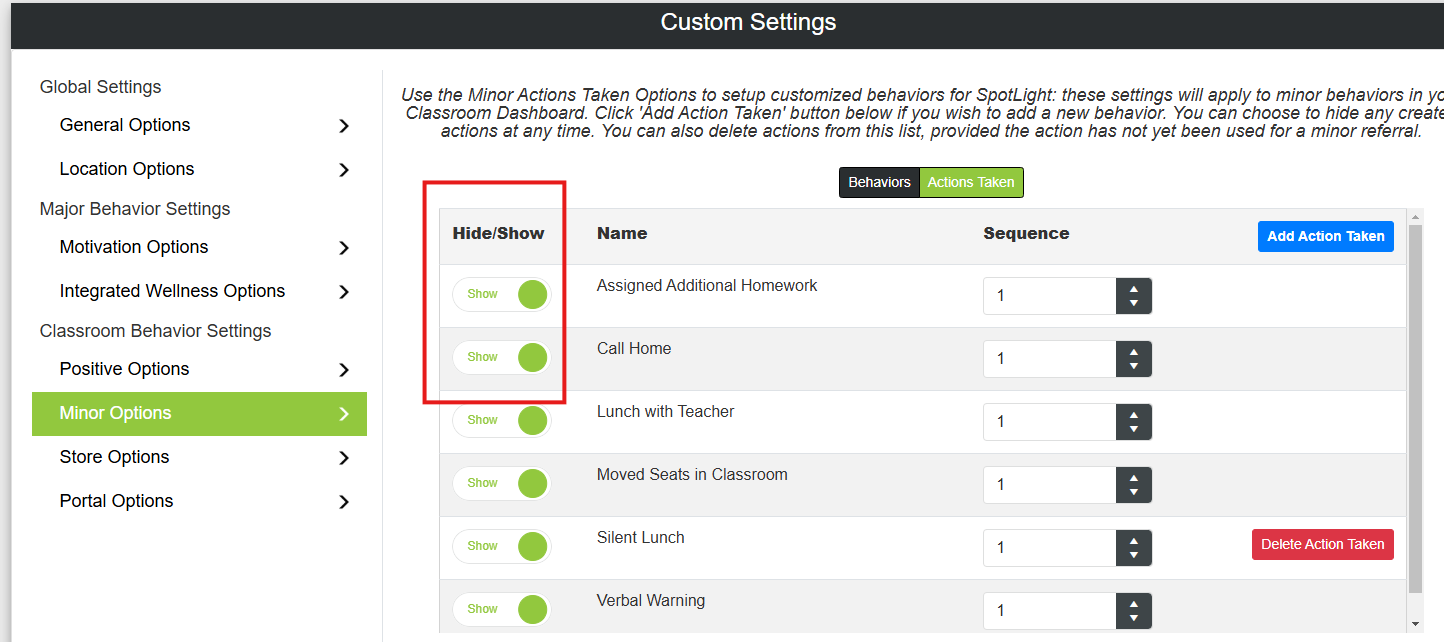
Hide/Show Action Taken
To hide/show an Action Taken option, use the toggle next to the option and click save.
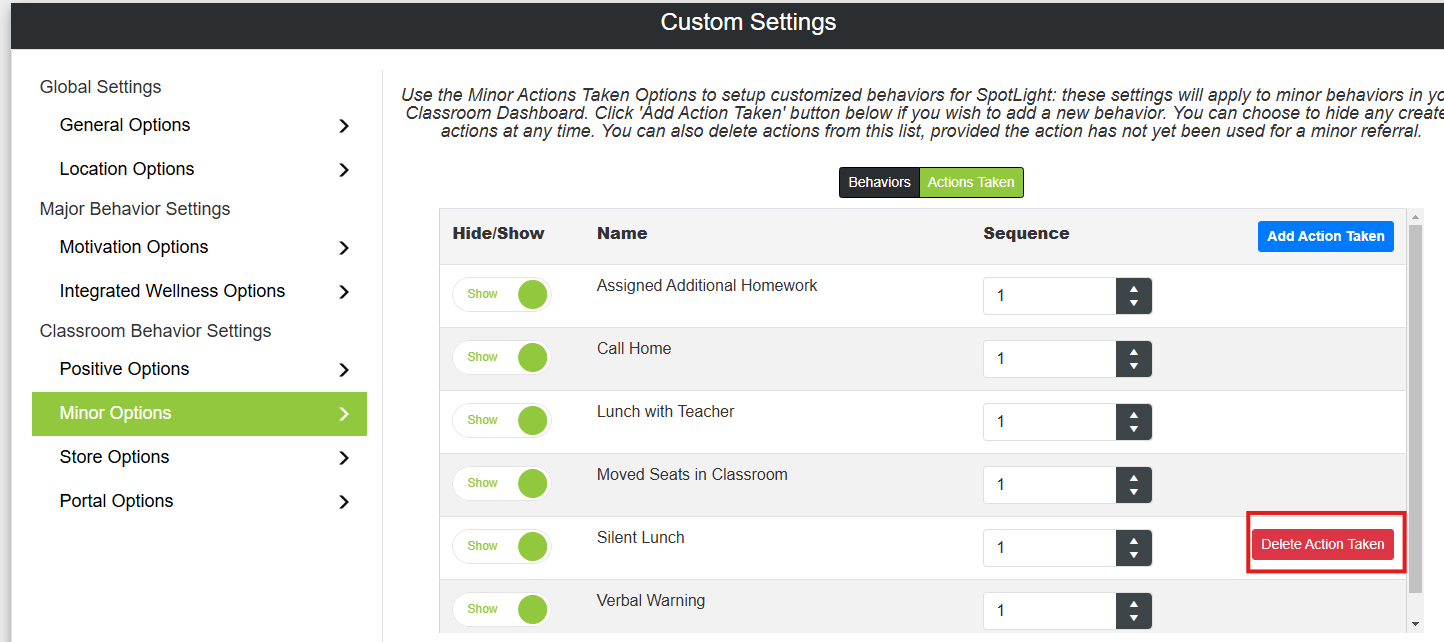
Delete Action Taken
If a minor action taken has not been used in SpotLight, the Delete Action Taken button will be available. To delete an unused action taken, click Delete Action Taken button and click Okay to confirm.
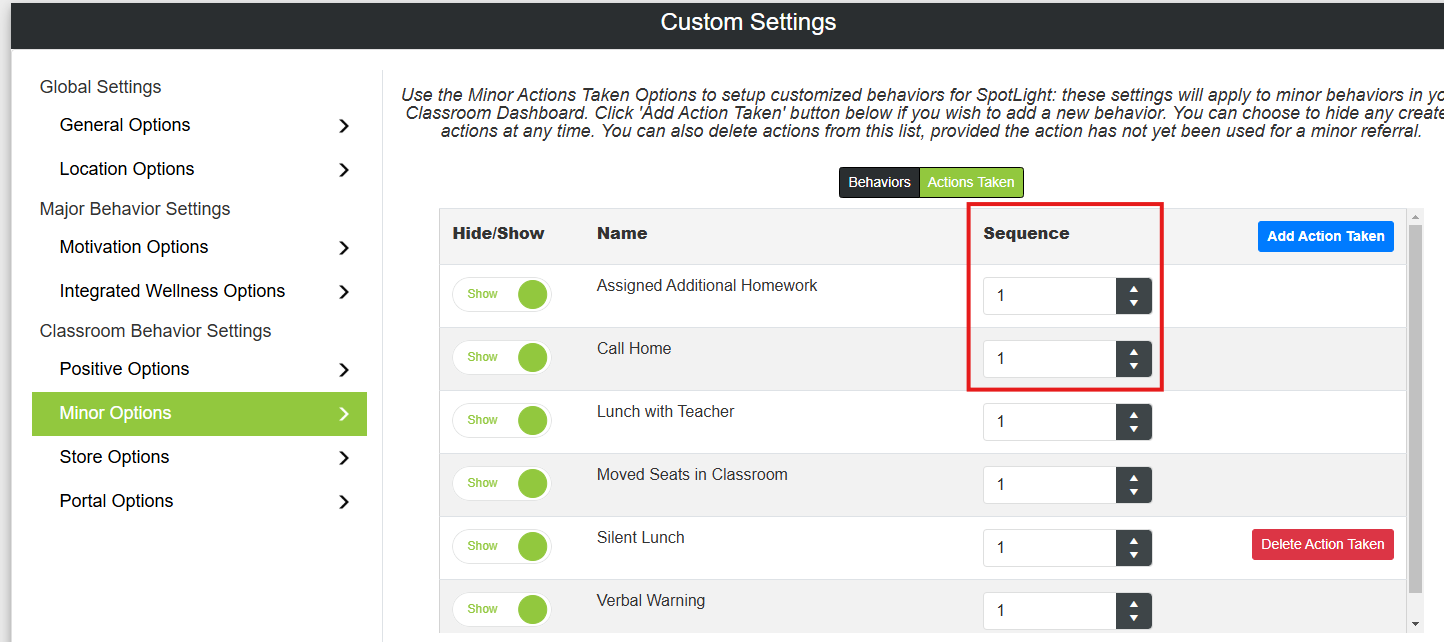
Sequence
The sequence will determine the order the Action Taken options appear in the drop list for the end user. To set the sequence for Action Taken, select the number and click save. If sequence is set to 1 for all Actions taken, they will sort alphabetically.
Store Options
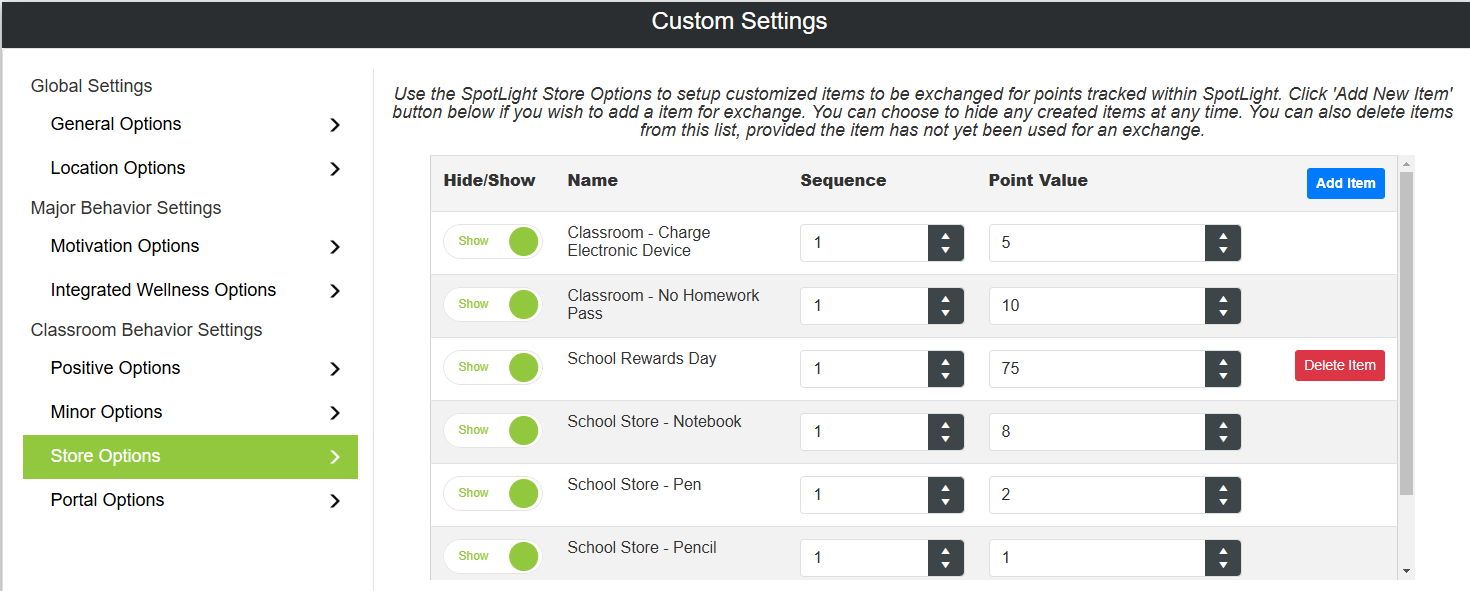
Create items or rewards for your students to purchase with their Positive points.
Add Item
Click Add item to add a new option for store purchase/exchange.
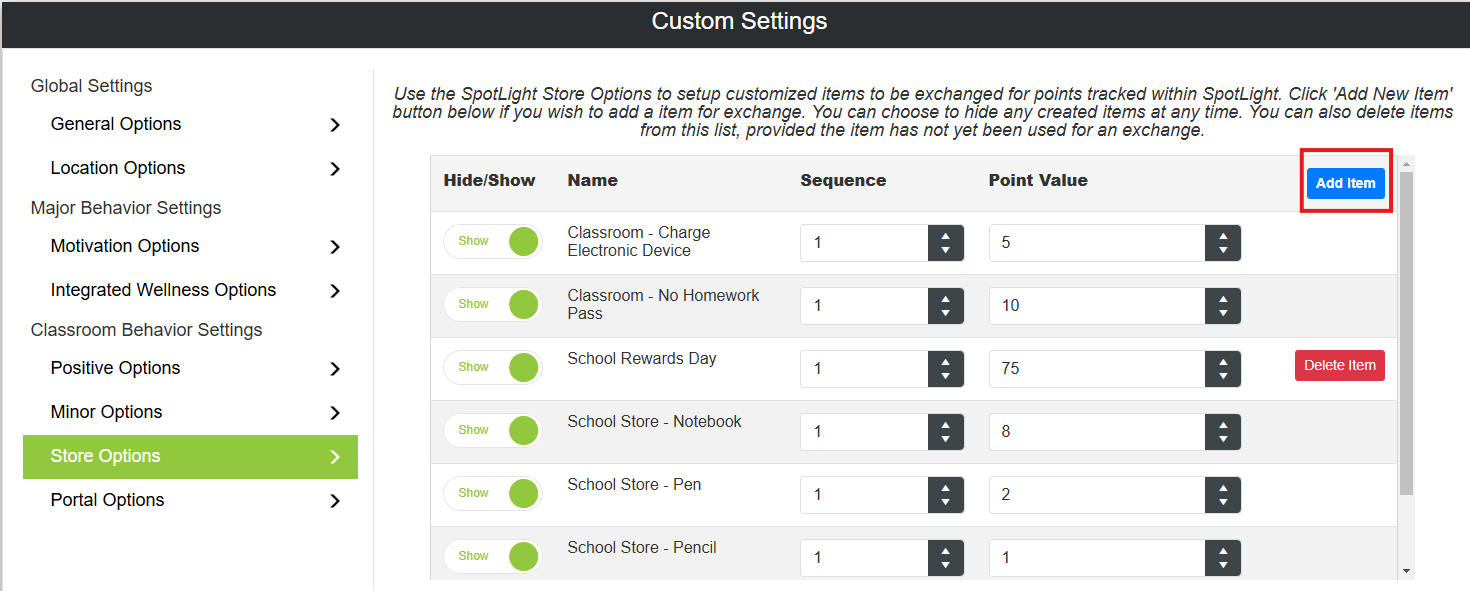
Enter the Store item name, sequence and points needed to purchase an item and then click Add.
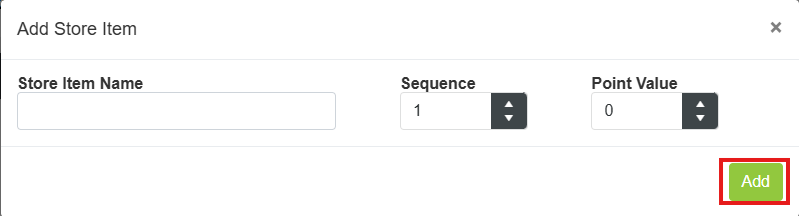
Delete Item
If a Store Item has not been used in SpotLight, the Delete Item button will be available. To delete a store option, click the Delete Item button and then click Okay to confirm.
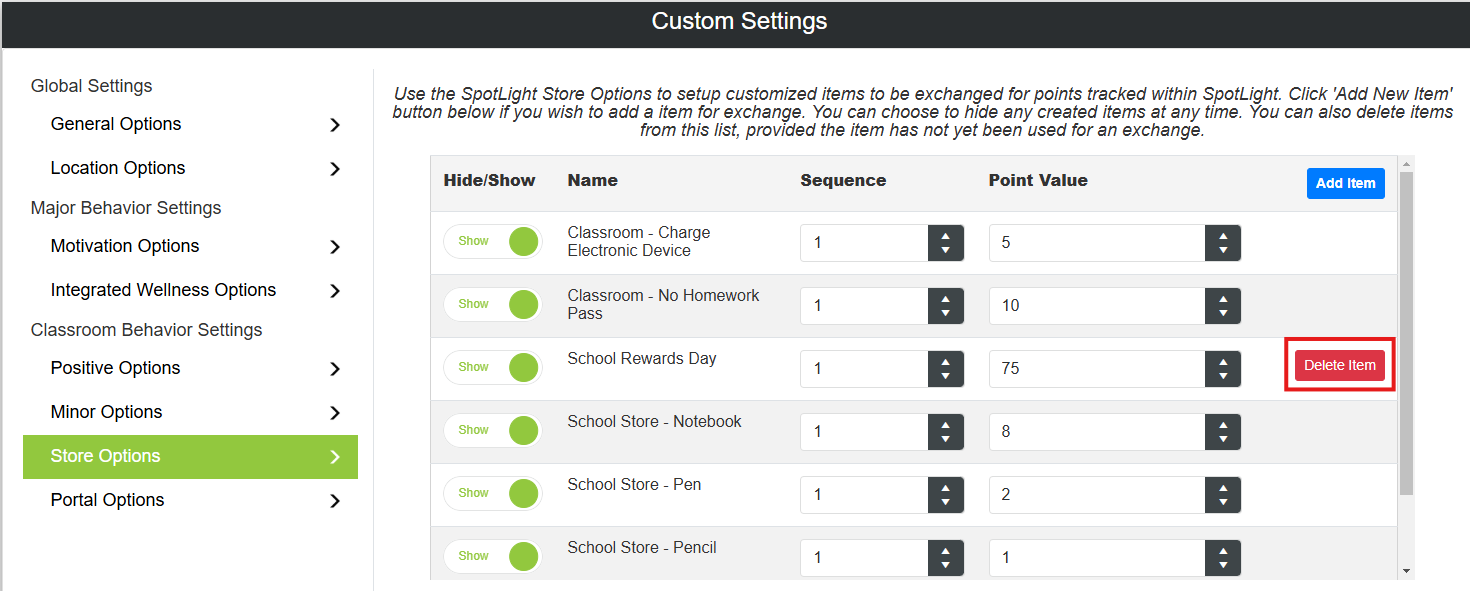
Show/Hide Item
To hide/show a Store option, use the toggle next to the option and click save.
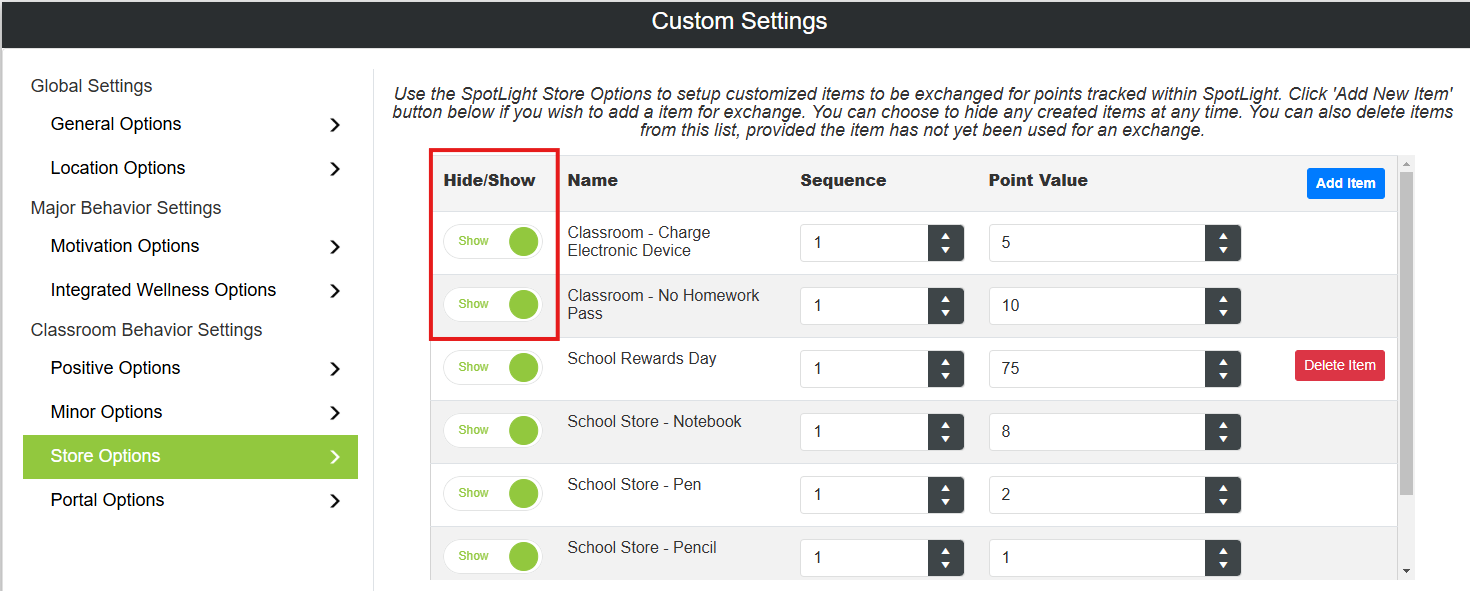
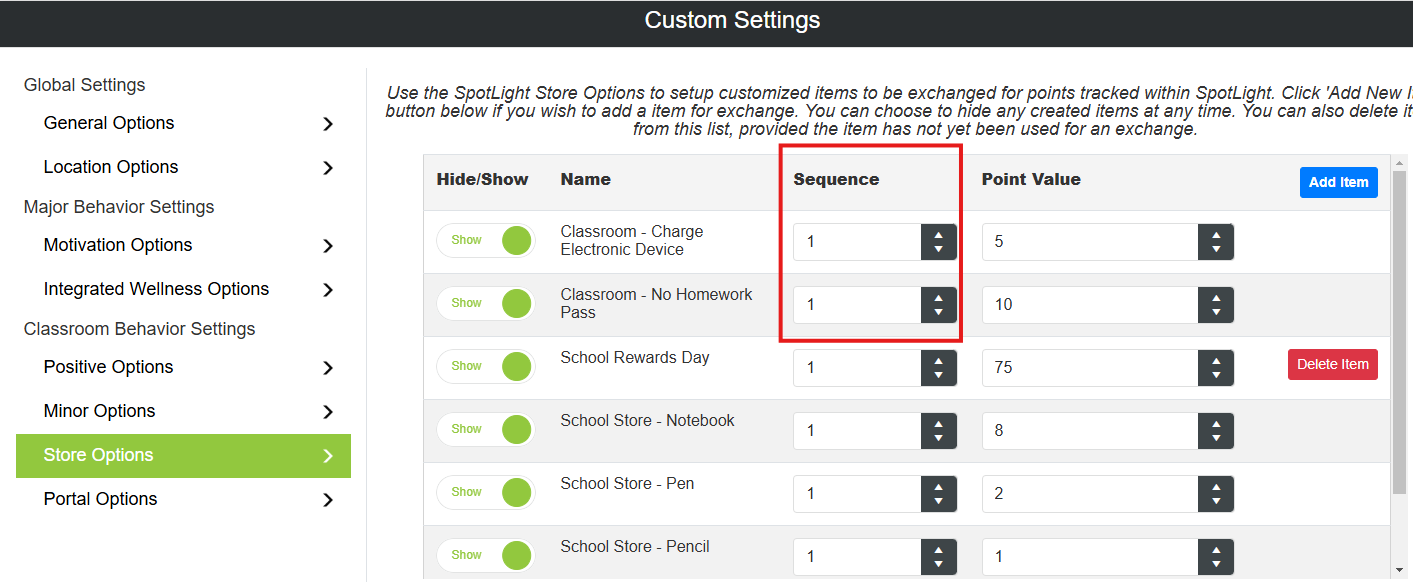
Sequence
The sequence will determine the order the Store Items appear in the drop list for the end user. To set the sequence for the Store Item, select the number and click save. If sequence is set to 1 for all Items, they will be sorted alphabetically.
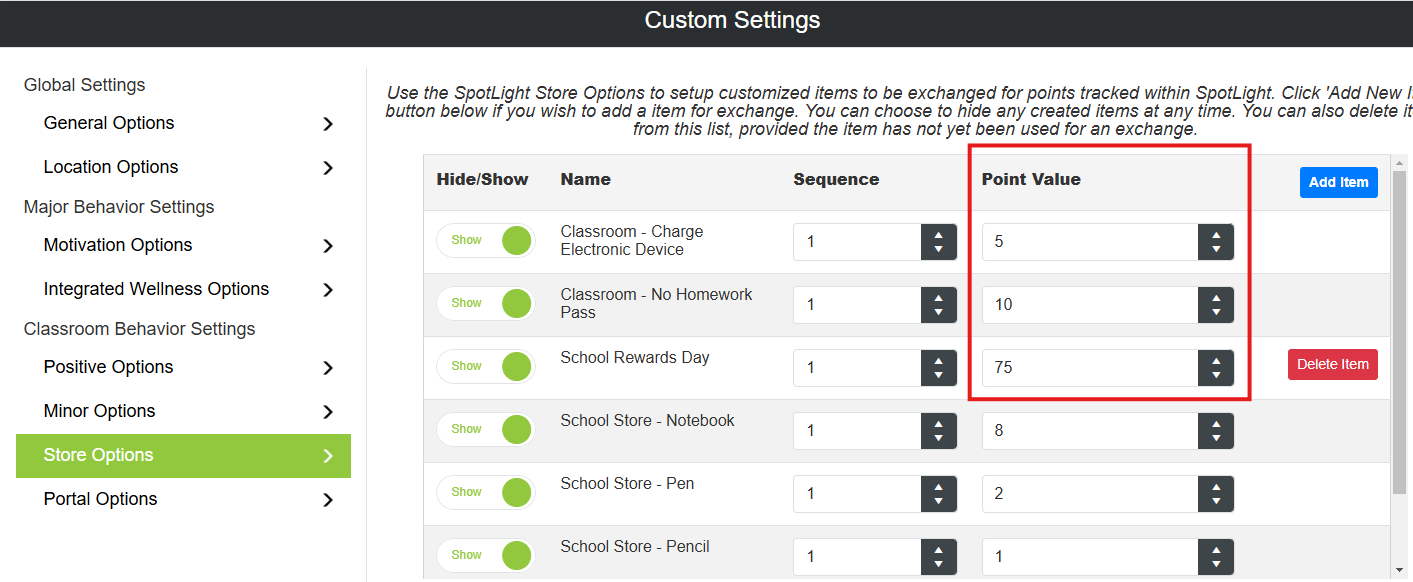
Points
The points will determine the number of points that a student must have to be able to exchange points for the item.
Portal Options
Control whether SpotLight appears on Student/Parent Portal, as well as what data is displayed there. Have added options so that students can see a total of all of their combined points.
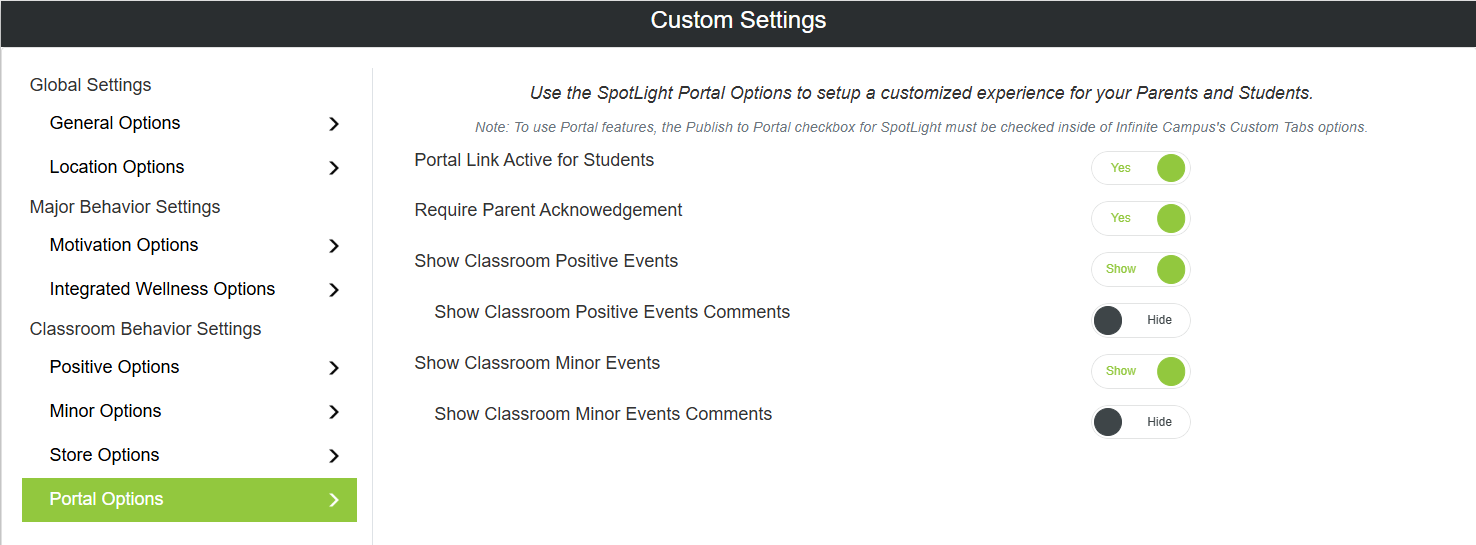
- Portal Link Active for Students: toggle whether SpotLight appears on the Student Portal.
- Parents asked to acknowledge each positive or minor classroom event their student has: enable the Parent Acknowledgement checkbox on the Parent Portal for each behavior.
- Show Classroom Positive Events: toggle whether the SpotLight Portal pages display the student's Positive Events.
- Show Classroom Positive Events - Comments: enable this to include comments associated with the displayed Positive Events.
- Show Classroom Minor Events: toggle whether the SpotLight Portal pages display the student's Minor Events.
- Show Classroom Minor Events - Comments: enable this to include comments associated with the Minor Events displayed.